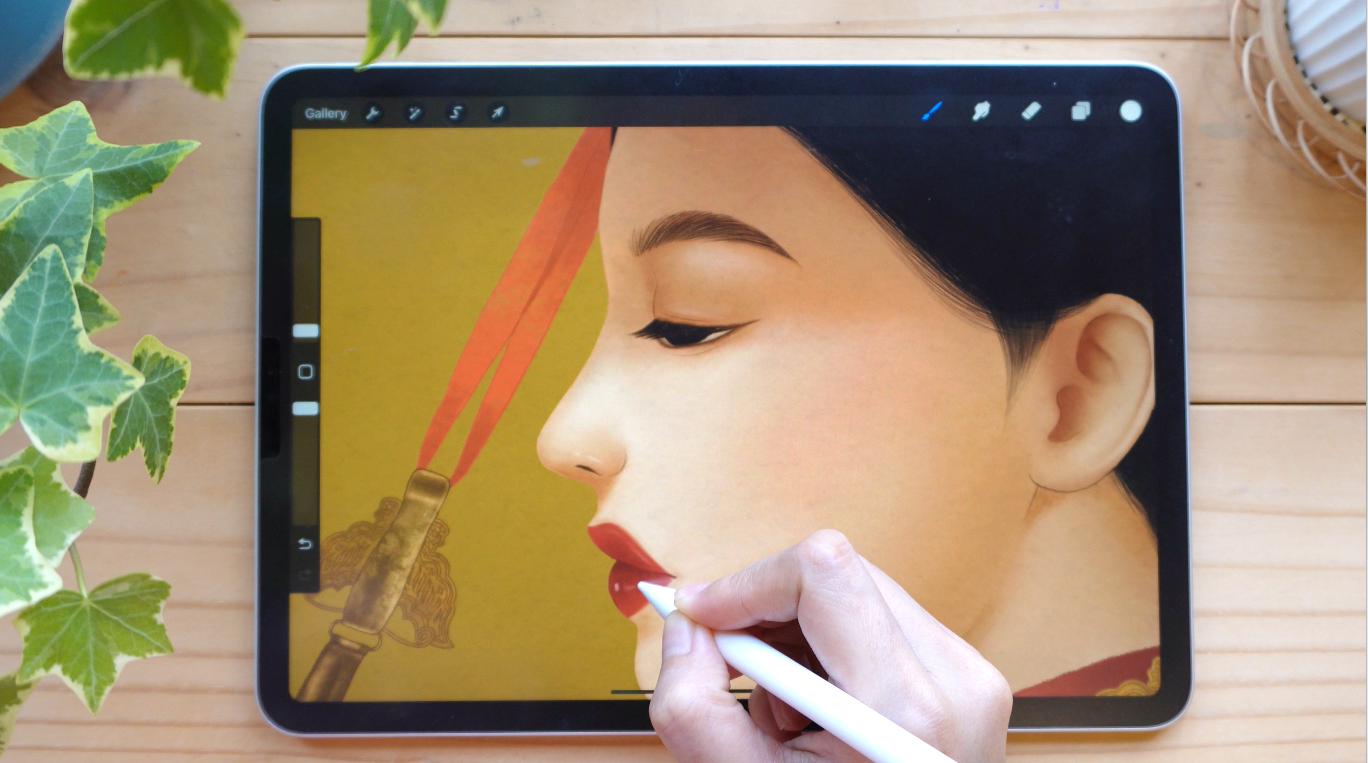
You don’t need to spend a penny because I’m going to use only the “DEFAULT” Procreate Brushes. And you know what makes this post special? you won’t even have to worry about adjusting any brush settings; simply open the app and start using them to create your artwork.
Summary
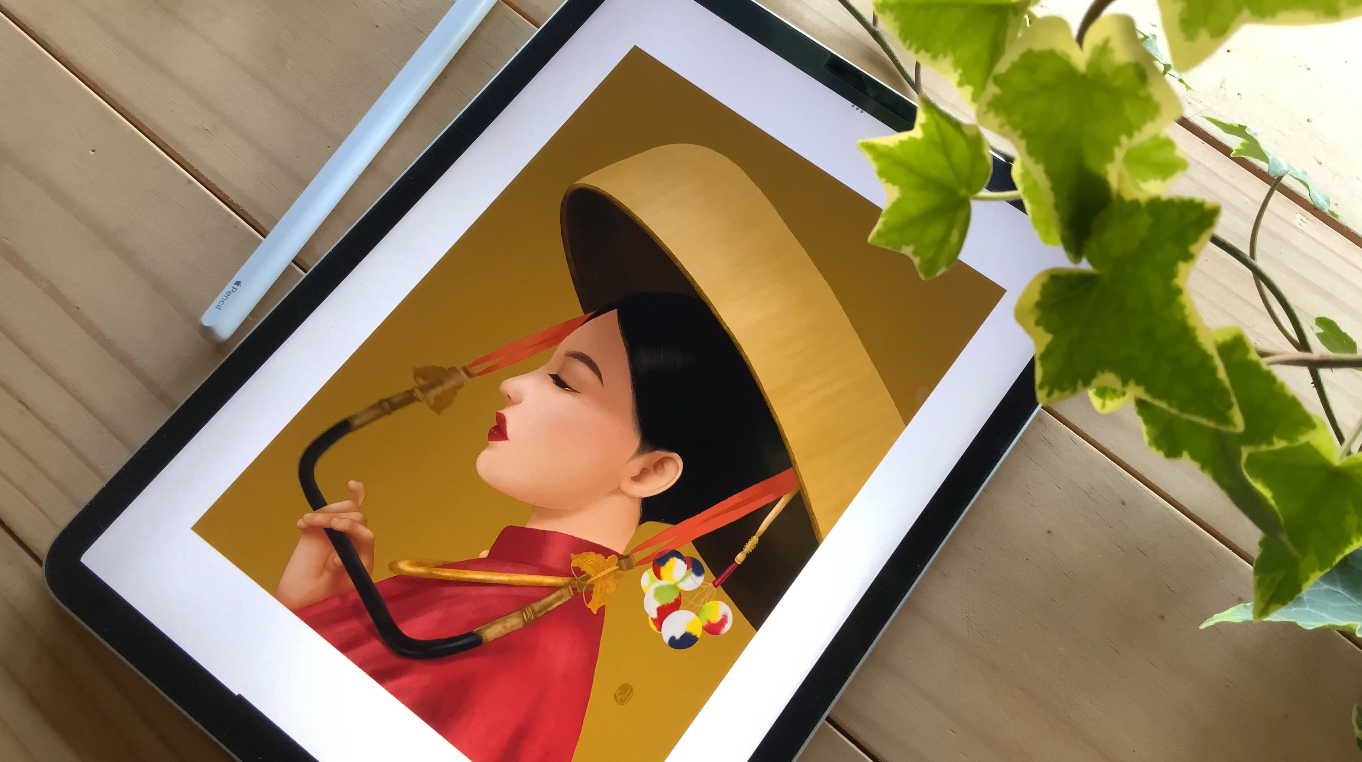
Let’s go through the brushes and their functions. I’ve divided my portrait painting into two parts.
Sketch
- Rough : Flat Brush
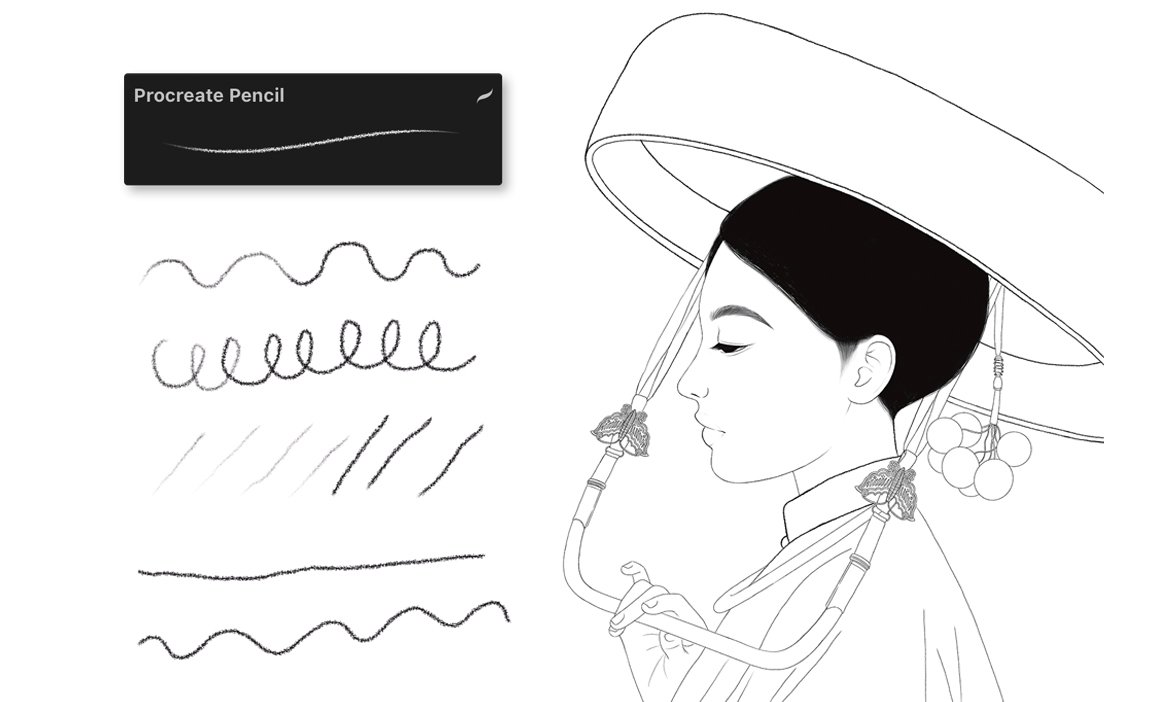
- Detail : Procreate Pencil
Base
- Color : Hard Airbrush
- Shade : Nikko Rull
- Blend : Soft Brush
- Highlight : Hard Airbrush, Flat Brush
OK, first let’s start with the Sketch section
I won’t be talking about the importance of sketching in painting. However, I want to emphasize that it’s always best to start any painting with a sketch. In fact, I’ve separated my sketch step into two layers called “Rough” and “Detail”, I always start with the “Flat Brush” for my rough sketches. I use this brush quite often for sketching and drawing, especially when I’m still in the early stages of creating a piece.
The Flat Brush has a rectangular shape, which allows you to create broad, sweeping strokes that can vary in opacity and thickness. What I love most about this brush is that it has a sensitivity to pressure. This means that the strength and thickness of the stroke will vary based on how hard you press down on the brush.
With minimal pressure, the brush produces strokes that are visible enough for me to build upon. This makes it easier for me to map out the basic shapes and proportions of my subject without worrying about committing to bold lines too early in the process.
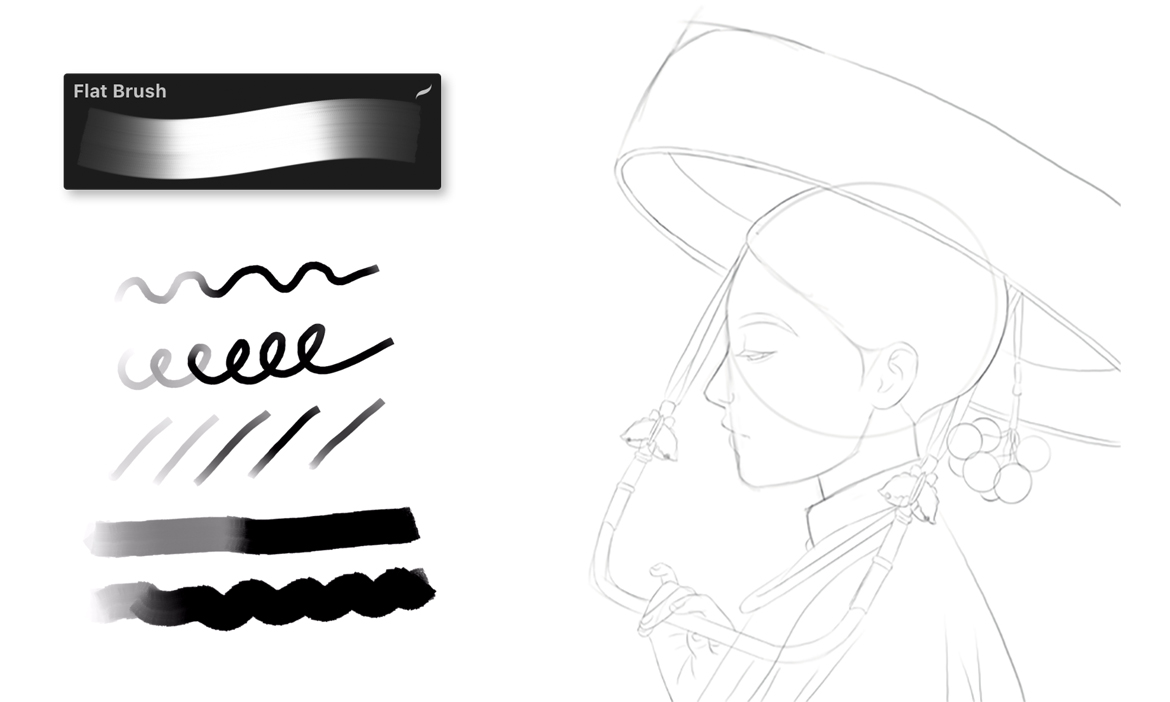
When using the Flat Brush for rough sketches, you don’t need to worry too much about your sketch being perfect. Just be comfortable with your sketch, and you can refine it later in the Detail layer. So, if you’re just starting out with Procreate or digital art, the Flat Brush is a great tool to help you get your ideas down quickly and easily.
When I’m happy with the rough sketch, I move on to creating perfect lines with the “Procreate Pencil” brush. This brush stands out from other sketch brushes in Procreate for its unique ability to create clean and precise lines with ease. Its hardness allows for fine, intricate details, and the brush’s sensitivity to pressure makes it easy to control the thickness of lines with varying pressure. Overall, the Procreate Pencil brush is a reliable and versatile tool that is essential for creating detailed and intricate artwork with clean and precise lines, but still with the traditional pencil look that adds personality to the piece.
Alright, now let’s compare all the “Pencil Brush” options in Procreate so you can see the difference.

As you can see, which of these brushes gives you the feel of a traditional pencil look?
Ok then, let’s move on to the Base section
Before moving on to the Base section, it’s important to ensure that your sketch is clean and precise. Trust me, if you have a perfect sketch, everything else will go smoothly and easily. You’ll have more time to focus on adding color and shading without worrying about fixing lines.
This video is all about brushes, so I won’t be covering the selection tool for coloring. Instead, I’ll be showing you the brush I use for coloring, which is the “Hard Airbrush”. This brush is great for laying down solid blocks of color quickly and efficiently.
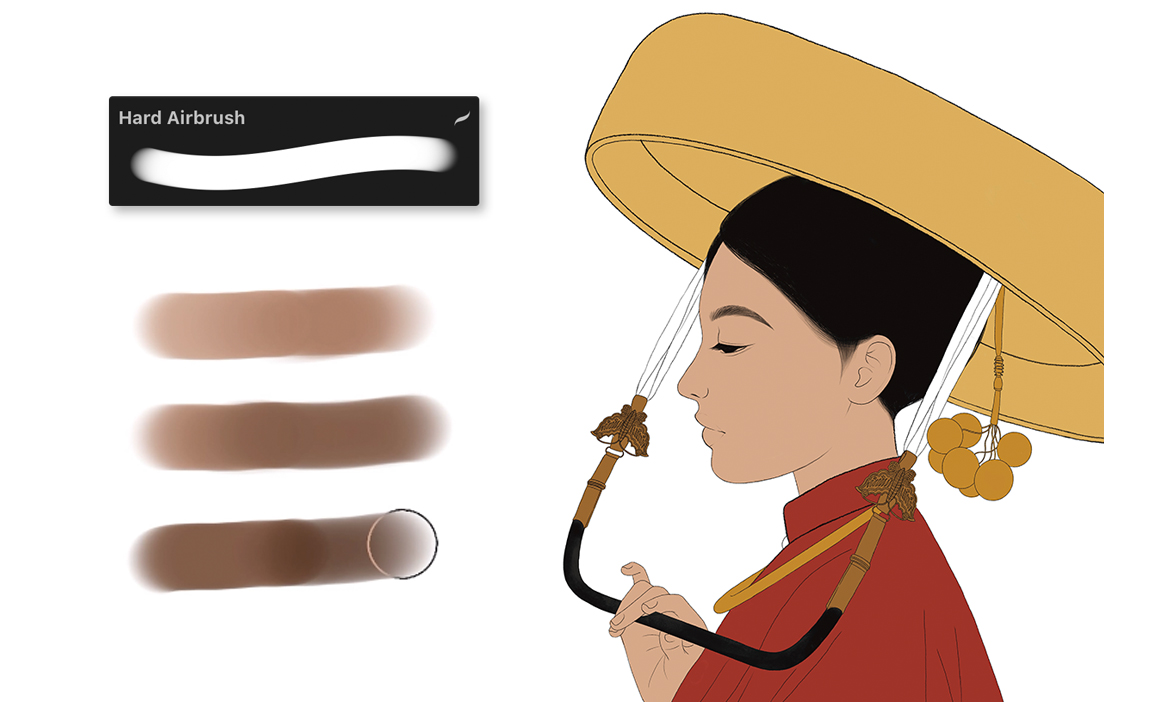
The Hard Airbrush is a versatile brush that’s perfect for creating smooth and even color gradients. The Hard Airbrush is particularly great for creating sharp edges and clean lines, making it ideal for adding color to detailed areas of your artwork.
One thing to keep in mind when using the Hard Airbrush is that it can be quite opaque, so you’ll want to adjust the opacity level as needed. That way, you can achieve the perfect balance between solid coverage and subtle shading.
Actually, you can use the Hard Airbrush for shading as well, but for my personal style, I prefer to use a different brush called the “Nikko Rull”. I love using the Nikko Rull brush for its ability to bring an old-style traditional look to my artwork. As an artist, I appreciate the beauty of traditional mediums such as pencil, charcoal, quill and watercolor. The texture of the Nikko Rull brush closely resembles the texture of these traditional mediums, allowing me to achieve a similar look and feel in my digital artwork. This is especially important to me as I strive to bridge the gap between traditional and digital art, and the Nikko Rull brush is the perfect tool to help me achieve this.
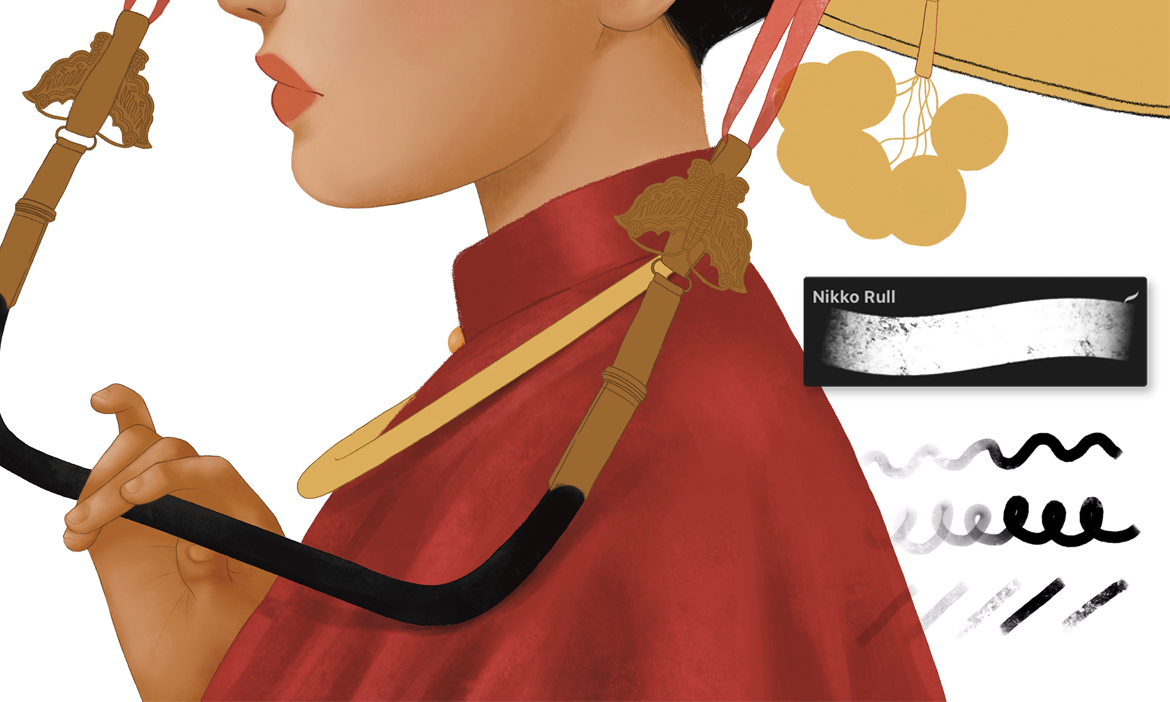
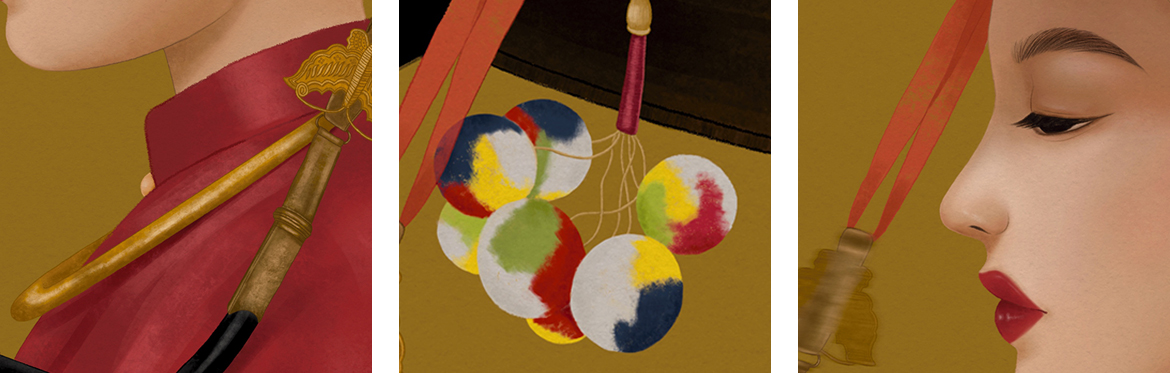
One of the things I absolutely love about the Nikko Rull brush is its versatility. It’s amazing how I can use this brush to create a variety of effects and textures in my artwork. For instance, I’ve used it to add a metallic sheen to a gold necklace, a fluffy look to the pom poms, and the weave texture to the fabric hat straps. This brush truly allows me to experiment and bring my artistic visions to life in a unique and dynamic way.
Overall, the Nikko Rull brush is an excellent tool for anyone who wants to create realistic, textured shading in their artwork. It’s a personal favorite of mine, I cannot tell how much I love it, and I highly recommend giving it a try in your own artwork. You won’t be disappointed!
When it comes to blending in Procreate, there are many brush options available, but I prefer to keep it simple and use the “Soft Brush” for portrait blending. It’s not a particularly special brush, but it’s easy to use and doesn’t require any adjustments – just pick the brush, lower the opacity, and start blending.
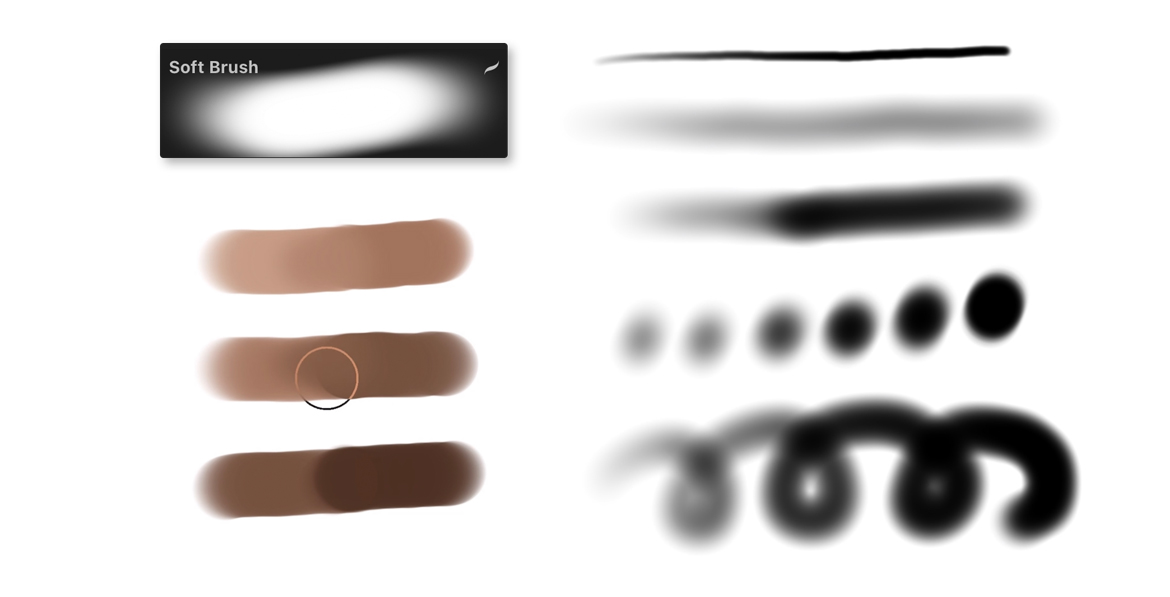
The Soft Brush’s ability to blend colors in a subtle and natural way makes it particularly useful for portrait painting, where achieving smooth skin tones and subtle color variations is crucial. It’s important to use the brush with a light touch to avoid over-blending. The Soft Blend brush is great for blending because it blends slightly and not too strongly, making it easy to control. If you hate making things complicated, just like me, this brush is the right choice for your blending needs.
Finally, at the highlighting part of my portrait paintings, I tend to keep things simple and avoid adding too many shiny effects. I prefer to maintain a clean and natural look to my artwork. For this reason, I typically choose between two brushes: the “Hard Airbrush” or the “Flat Brush”. Both of these brushes allow me to add subtle highlights to specific areas of the portrait without overpowering the overall composition with excessive shine. By using these brushes, I can create a portrait that is both simple and elegant, with just the right amount of highlight to enhance its natural beauty.
Conclusion
The reason I created this video is because, just like many of you, I was once lost in my digital art journey. I found myself overwhelmed and confused after watching so many YouTube videos that introduced complicated techniques, custom brushes, and changes to brush settings.
I couldn’t find something that fit my needs, and I just wanted a simple and easy-to-use brush that would allow me to enjoy painting without worrying about the technical details. That’s why I decided to explore all of the default Procreate brushes and created a brush set that only uses them. Based on my experience, I found that the default brushes are more than enough to create beautiful and professional-looking portraits. My hope is that this video will serve as a beginner-friendly guide for those who are just starting out with digital portrait painting and are looking for a simple and straightforward approach.
Thank you for spending time with me, and happy painting!