1. Add procreate to iPadOS Widgets
iPadOS Widgets let you add a permanent shortcut to Procreate on your iPad’s home screen. When you add Procreate as a Widget it will display the last artwork you worked on.
Tapping the Widget will bypass the Procreate Gallery and jump straight to your artwork, ready to work where you last left off.
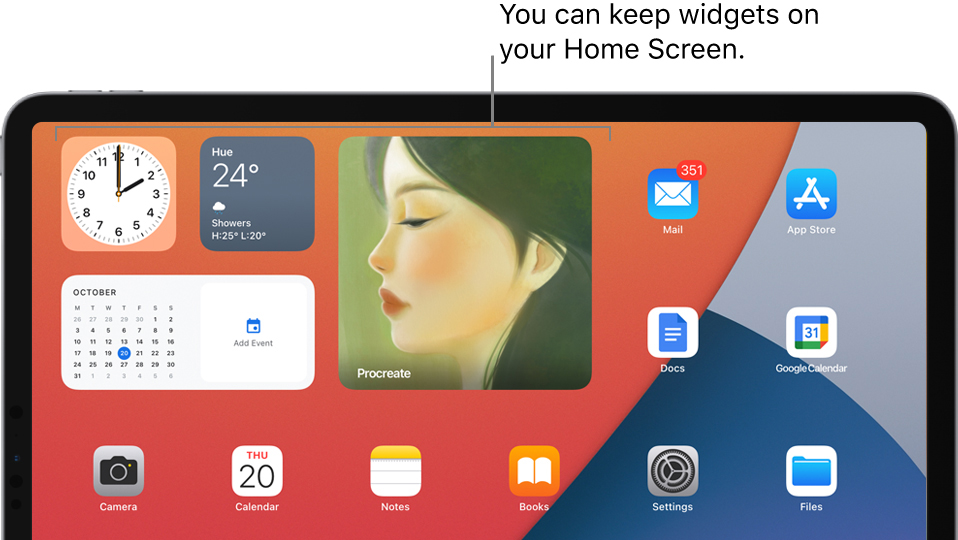
• Go to the Home Screen page where you want to add the widget, then touch and hold the Home Screen background until the apps begin to jiggle.
• Tap the “Add Widget” button at the top of the screen to open the widget gallery.
• Scroll or search to find the widget you want, tap it, then swipe left and right through the size options.
• The different sizes display different information.
• When you see the size you want, tap Add Widget.
• While the apps are still jiggling, move the widget where you want it on the screen, then tap Done.
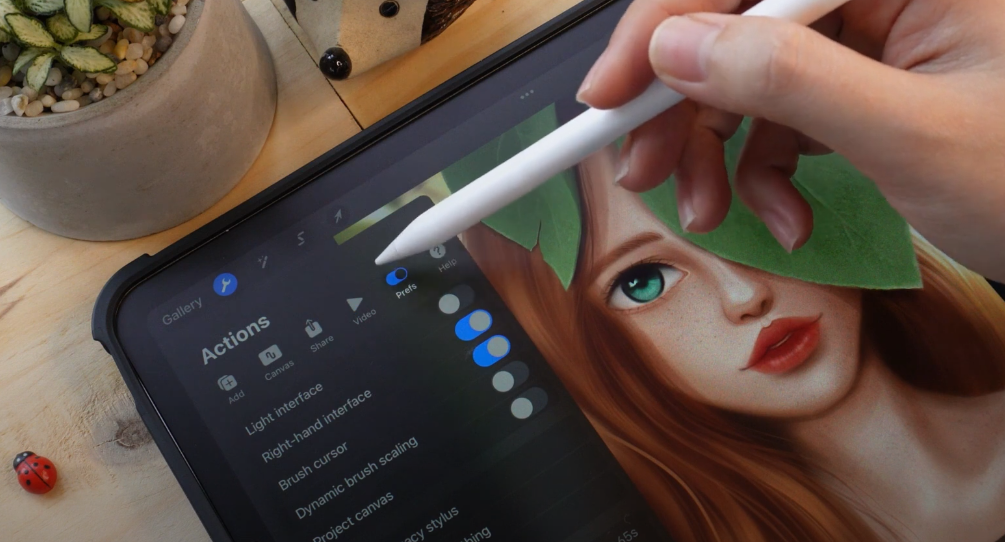
2. Light interface
Dark Mode is a default interface that keeps the focus on your artwork. But for most cases, we usually post our art on the light interface such as Instagram, Twitter, Pinterest, and Etsy,…so let’s change to the light interface to check and maybe make a tweak before posting.
Tap Actions > Prefs > Light Interface to switch to Light Mode.
3. Save your own canvas size
You work on different canvas sizes but you don’t want to write them every time. Yes, same here! You can customize your canvas sizes to save time. I mostly post my art on Instagram and print up to A3 large size so I’m going to create a custom canvas for Instagram and A3 sizes: 1080×2350 and 297x420mm. They are so helpful for quick batching.
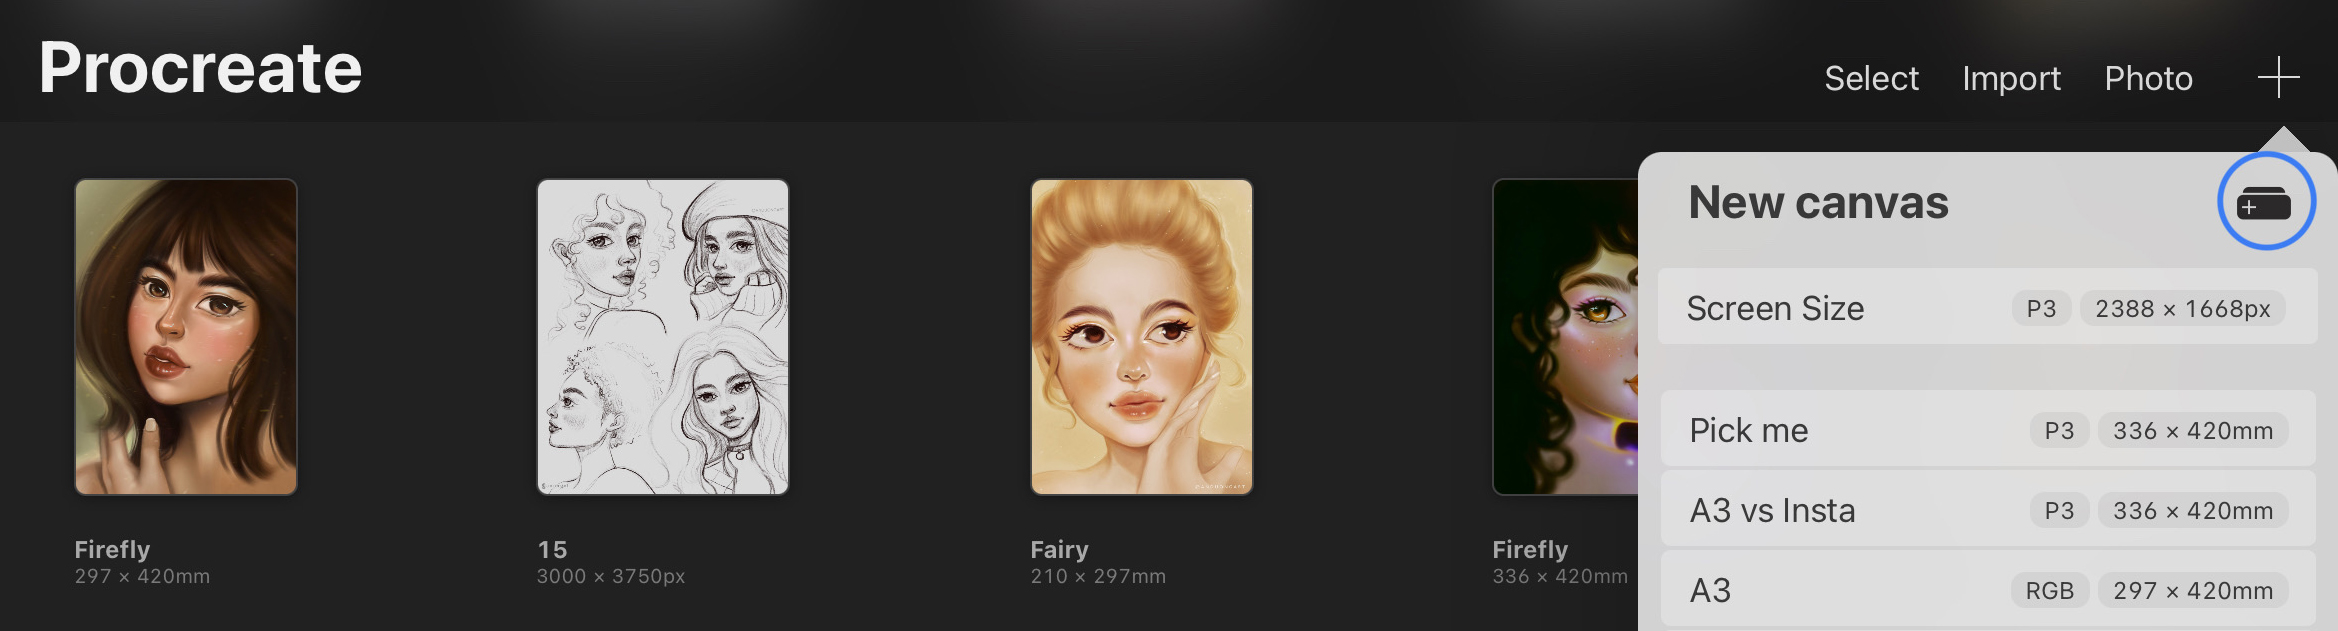
• When you open up your Procreate app, this is the first screen you should see: Procreate Gallery
• Click the ‘+’ in the top right. This pulls up the New Canvas drop-down menu. Now you should see a bunch of procreates default canvases in this window.
• Tap the “Add Canvas” icon. Next, add a custom canvas. This icon looks like two rectangles stacked on top of each other with a ‘+’ on it.
• Select your custom canvas dimensions. For a specific size, just look up the exact dimensions needed for your project in google (ex. Instagram stories dimensions are 1080 x 1920 pixels).
• Finally, pick the name that pertains to your dimensions (ex. I named mine ‘Instagram’).
• Tap “Create”.You’re done! Now the custom canvas size template is in your canvas drop-down menu for next time.
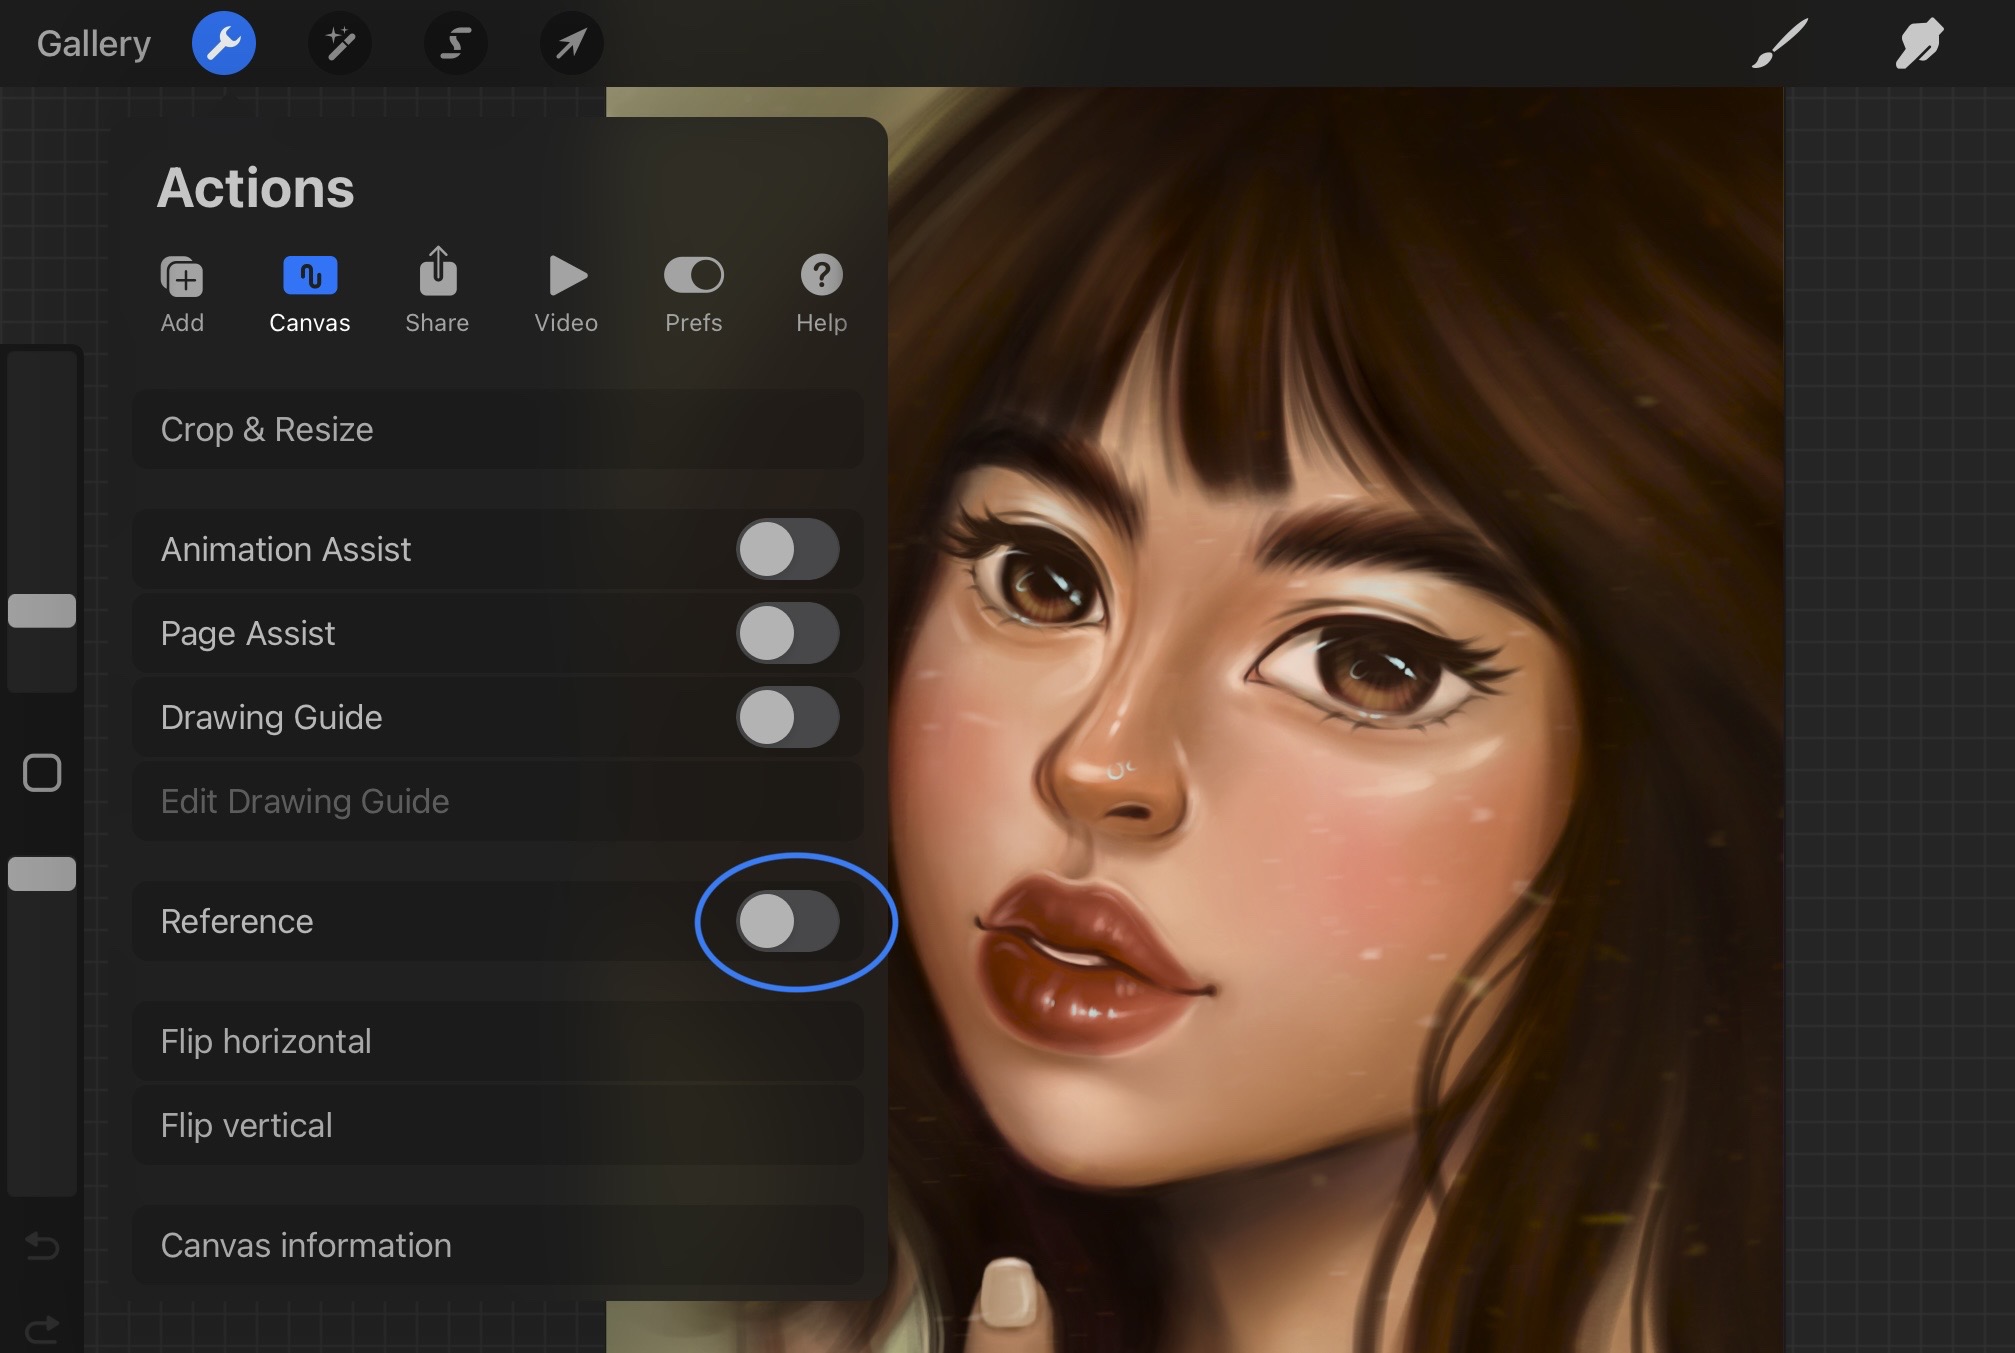
4. Two ways to work with reference
If you love to paint portraits like me, you might want to use a reference. There’re 2 ways:
• The first one is to add a reference window: go to action and turn on reference. You can also move the window, and zoom in and out the photo.
• The second way is open the secondary window. You can wipe up the bottom of the screen and choose the app that you need: image, Pinterest, or safari,…You can adjust the size, zoom, and search.

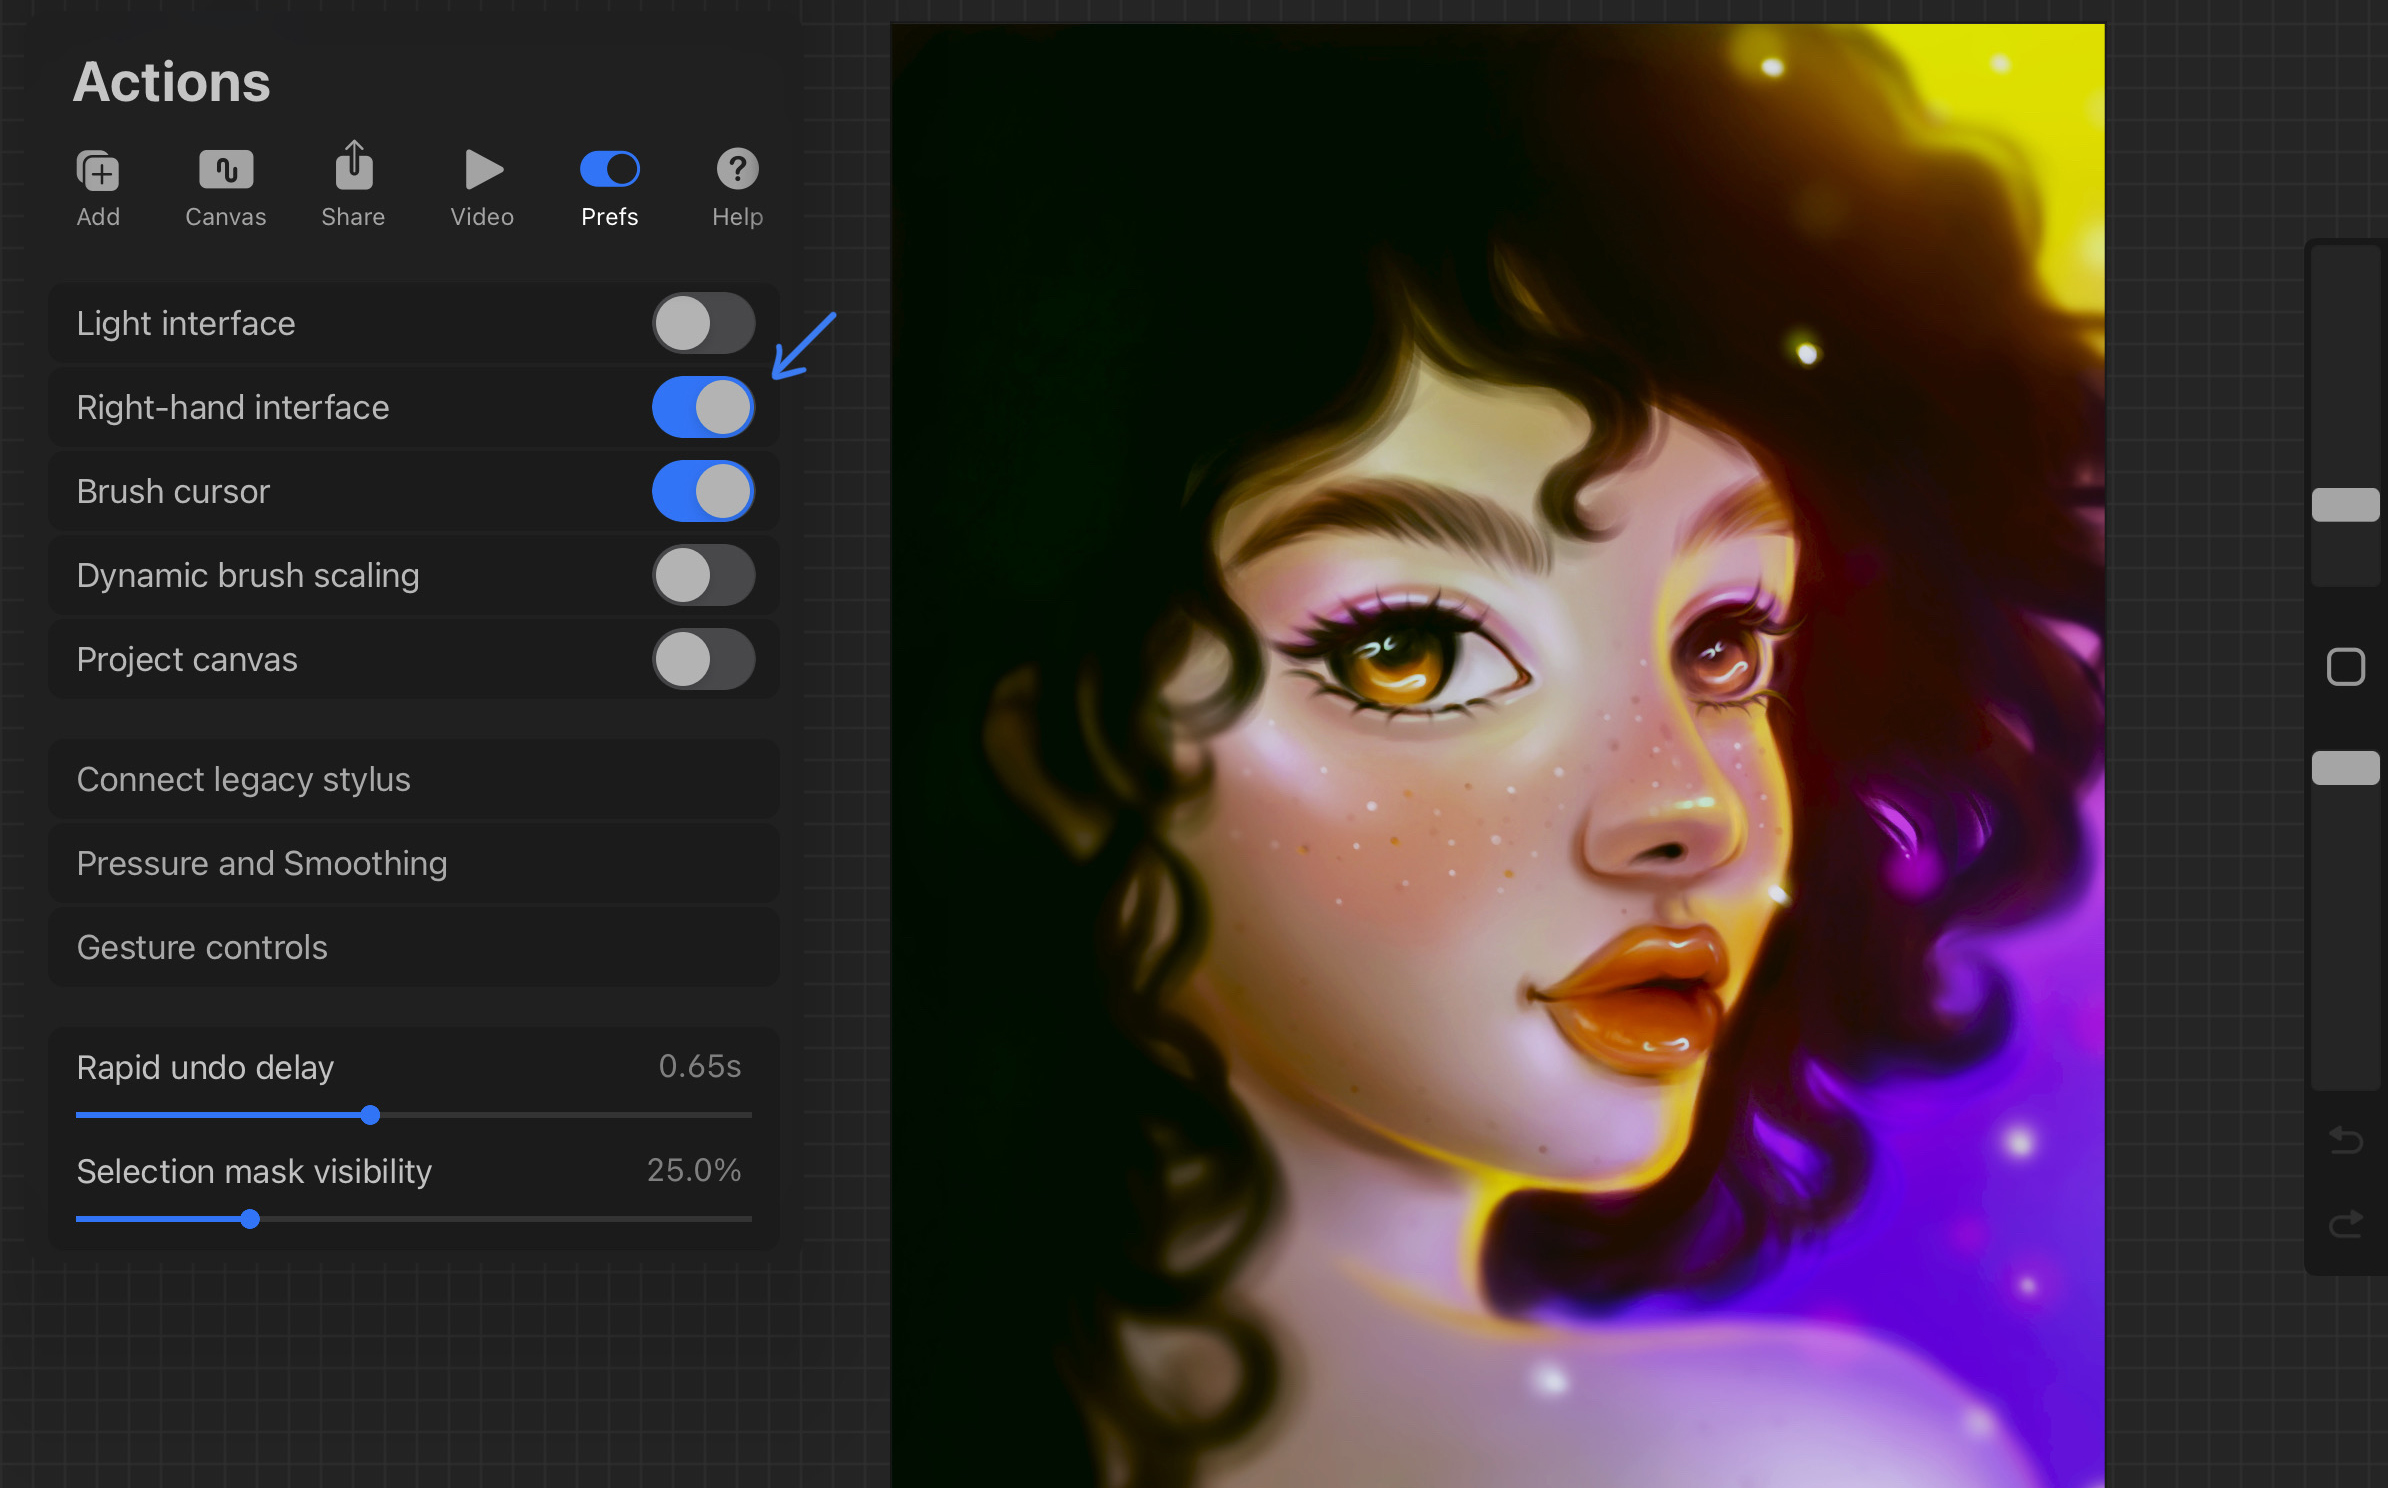
5. Right-hand interface
The default Procreate Sidebar is designed to be in easy reach of your left hand while you paint with your right.
But let’s try the right-hand interface! It might speed up your workflow, at least for me it does. For example, your reference pop-up is on the left, and you work with your fingers like zoom, undo, and clear,…also on the left and work with pencil on the right with painting, resize the brush and change the brush opacity.
Tap Actions > Prefs > Right-hand interface to switch sides.
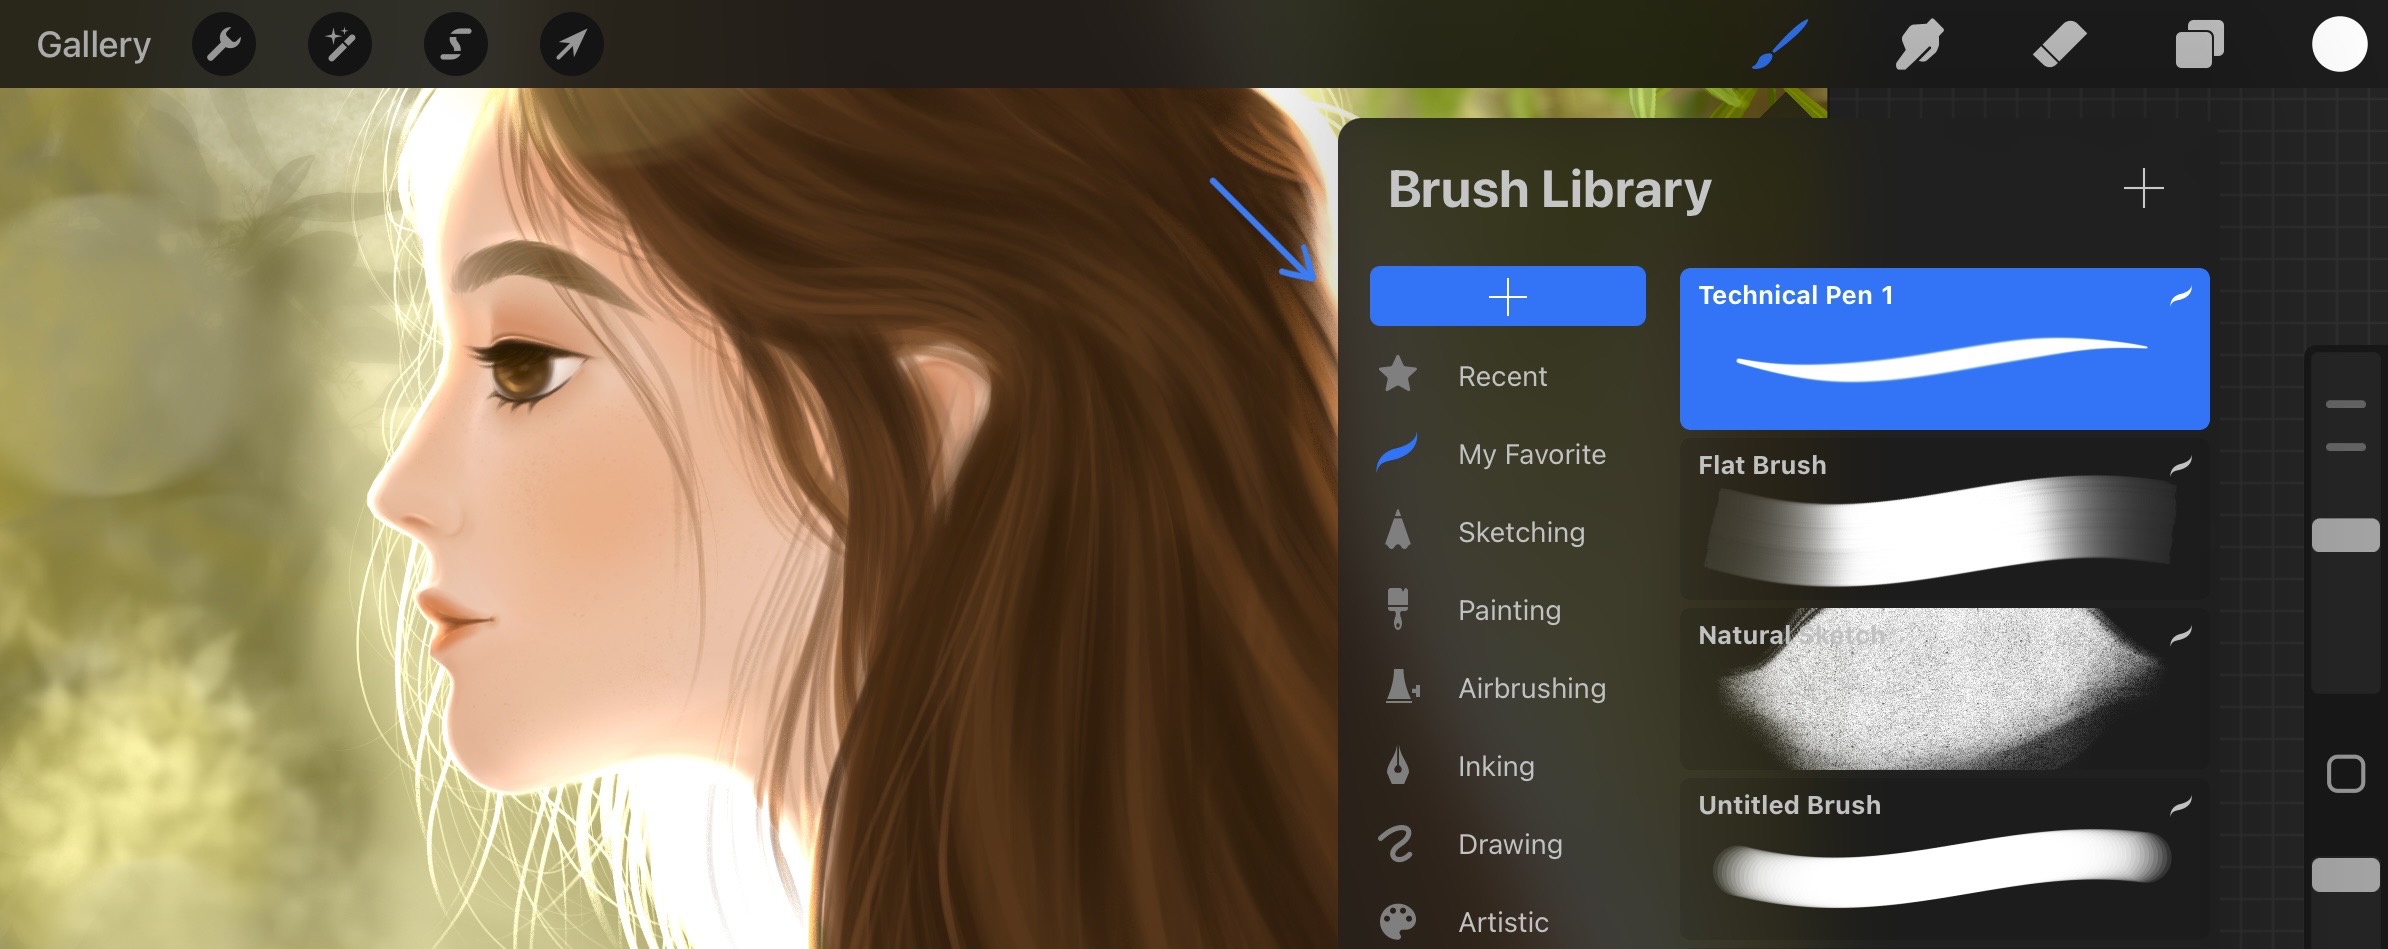
6. Arrange your brush set
It makes the most sense for you to find the brushes you need as quickly as possible. There are too many brush sets with different purposes such as sketching, painting, drawing, and textures but you know, we only use several brushes. So If there are certain brushes that you use a LOT, it can be annoying to navigate to different folders whenever you need to switch between them.
Let’s create your favorite brush set by the ‘+’ icon, and create a new set, named it. Then drag and drop your favorite brushes and DONE! Now you can quickly access the brushes you need right away.
You guys can check my video on Youtube with the same content for the first 6 tips down below
[youtube]https://www.youtube.com/embed/A8qv5ZjW1ms[/youtube]
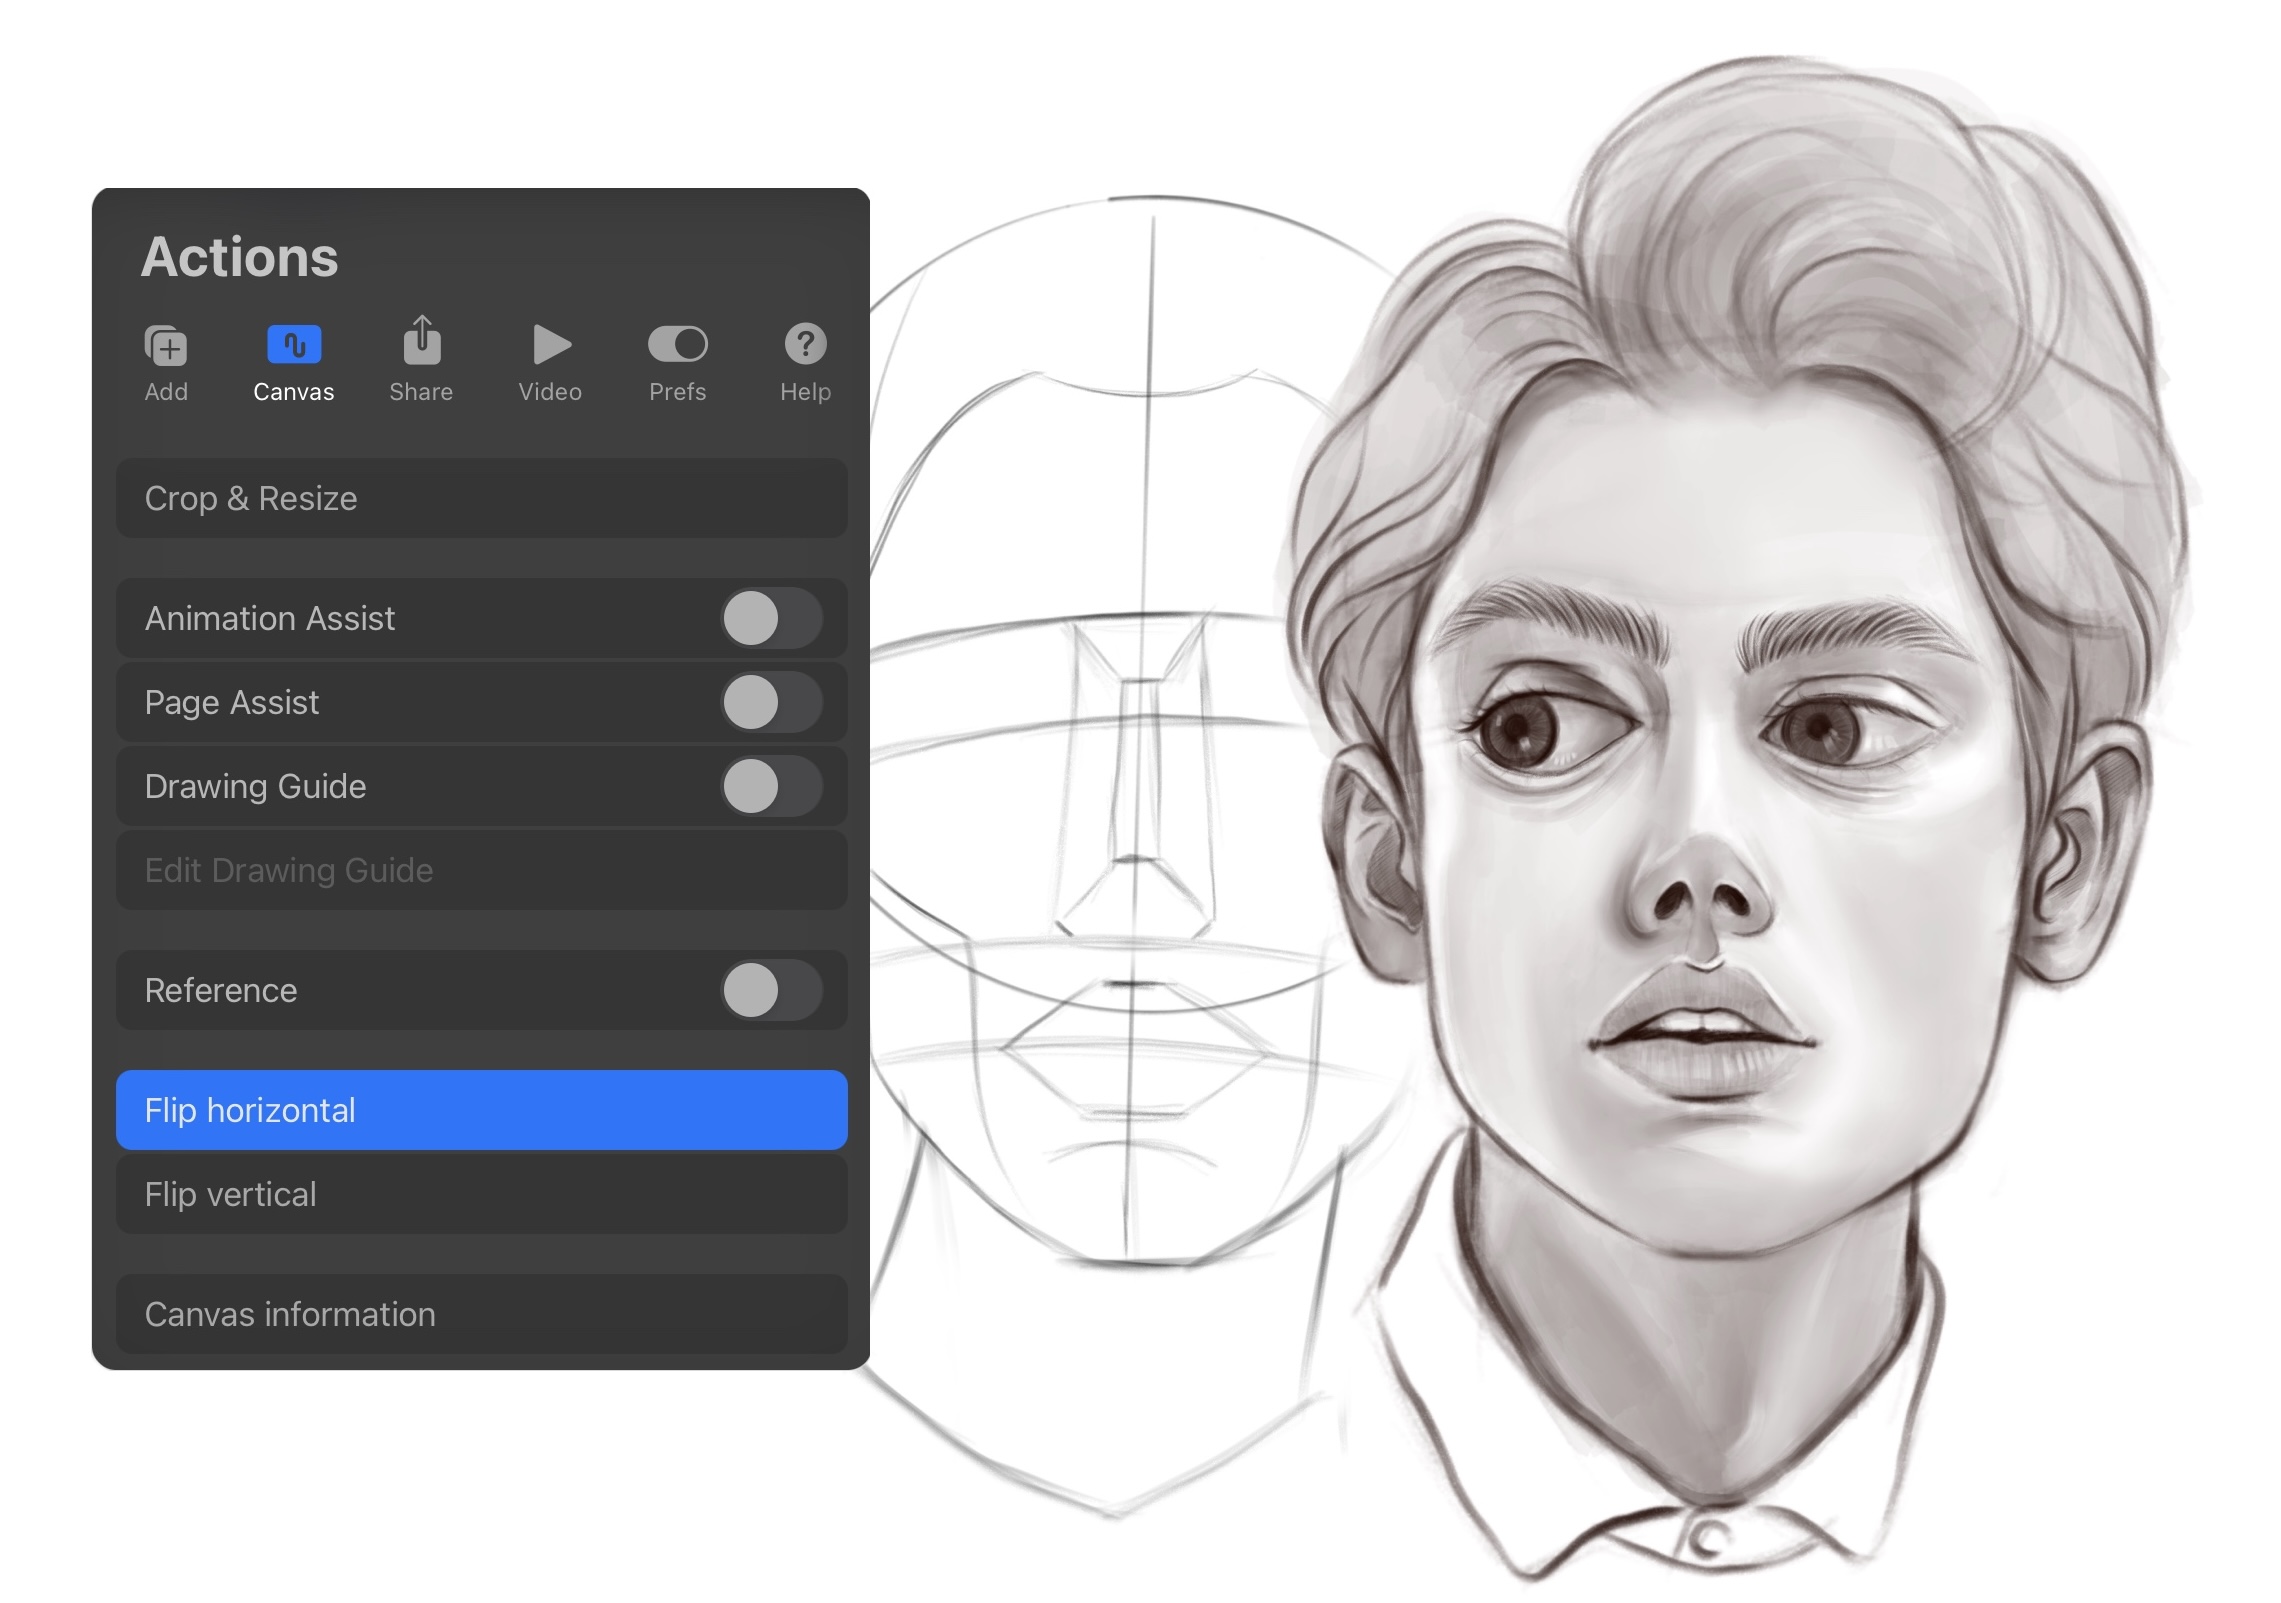
7. Flip the canvas
Flipping your canvas in Procreate is important to master, whether you want to flip your art horizontally or vertically. For me, I’m using a flip horizontally to sketch or paint eyes and eyebrows on the left.
There are actually two ways to flip your canvas, but one way takes longer than the other. The fastest way you need to access your QuickMenu is by clicking the Actions tab – Choose the Preferences tab and then click on Gesture Controls. Now you can choose what works best for you, for me, I’m using “Three-finger swipe”.
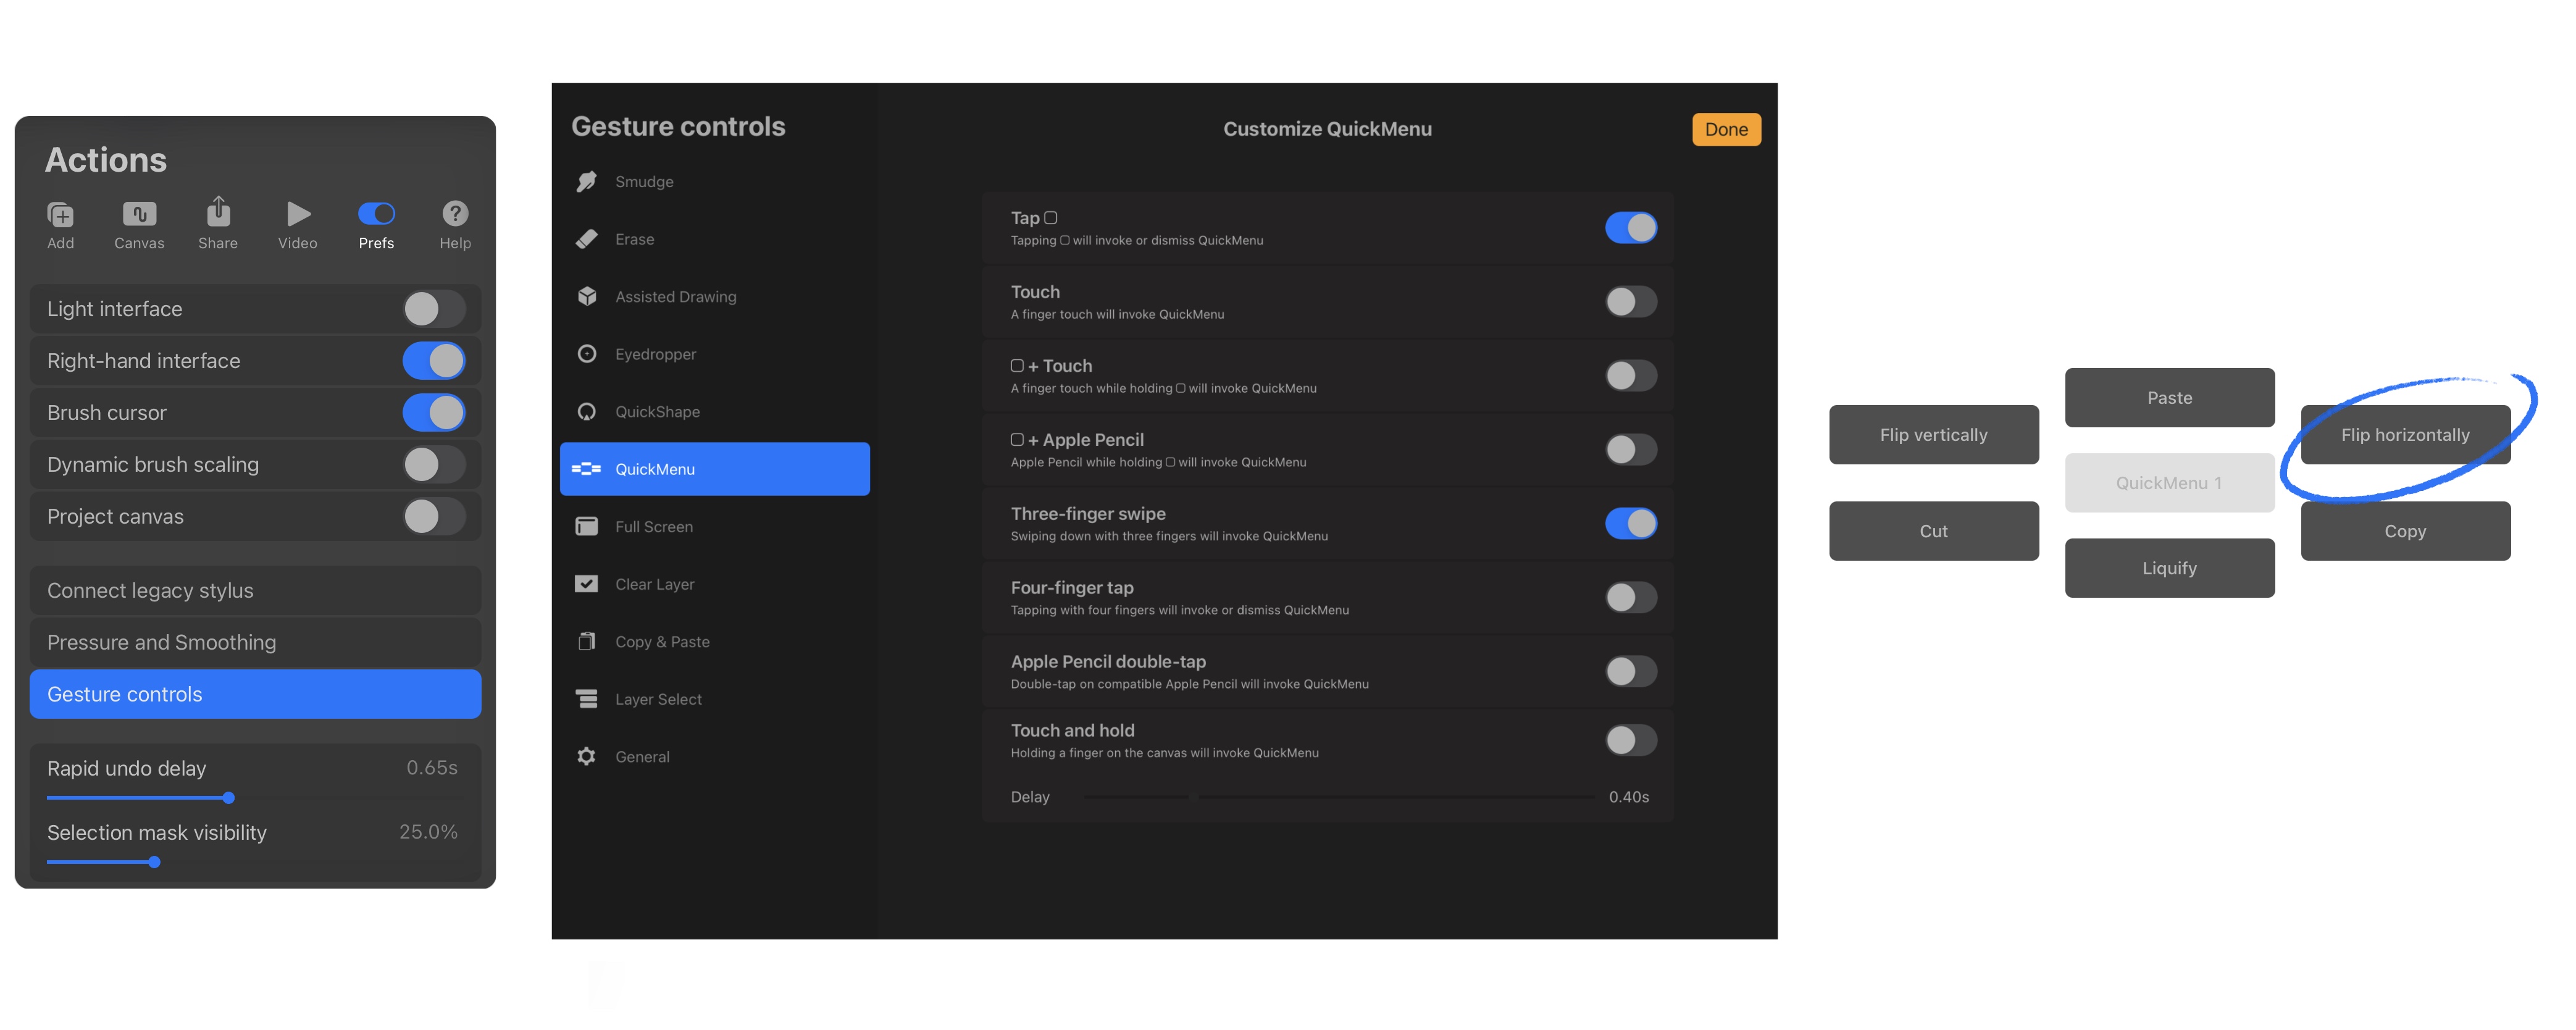
Another way, on the Actions tab, choose the Canvas tab and here, you have it.
8. Perfect Line and Shape
Procreate’s QuickShape can be used to draw perfect circles, squares, triangles, and lines. QuickShape is activated by a gesture of your choice. You can assign this gesture within the Gesture Controls panel of your Procreate Preferences. My favorite gesture is the “Draw and hold”. It’s unique to QuickShape, this means you won’t run into any conflicts with two actions having this same gesture.
Now, just draw your shape and hold it down with the pencil to make the line perfectly smooth. Holding down another finger on the screen will create a perfect circle, square, or equilateral triangle.
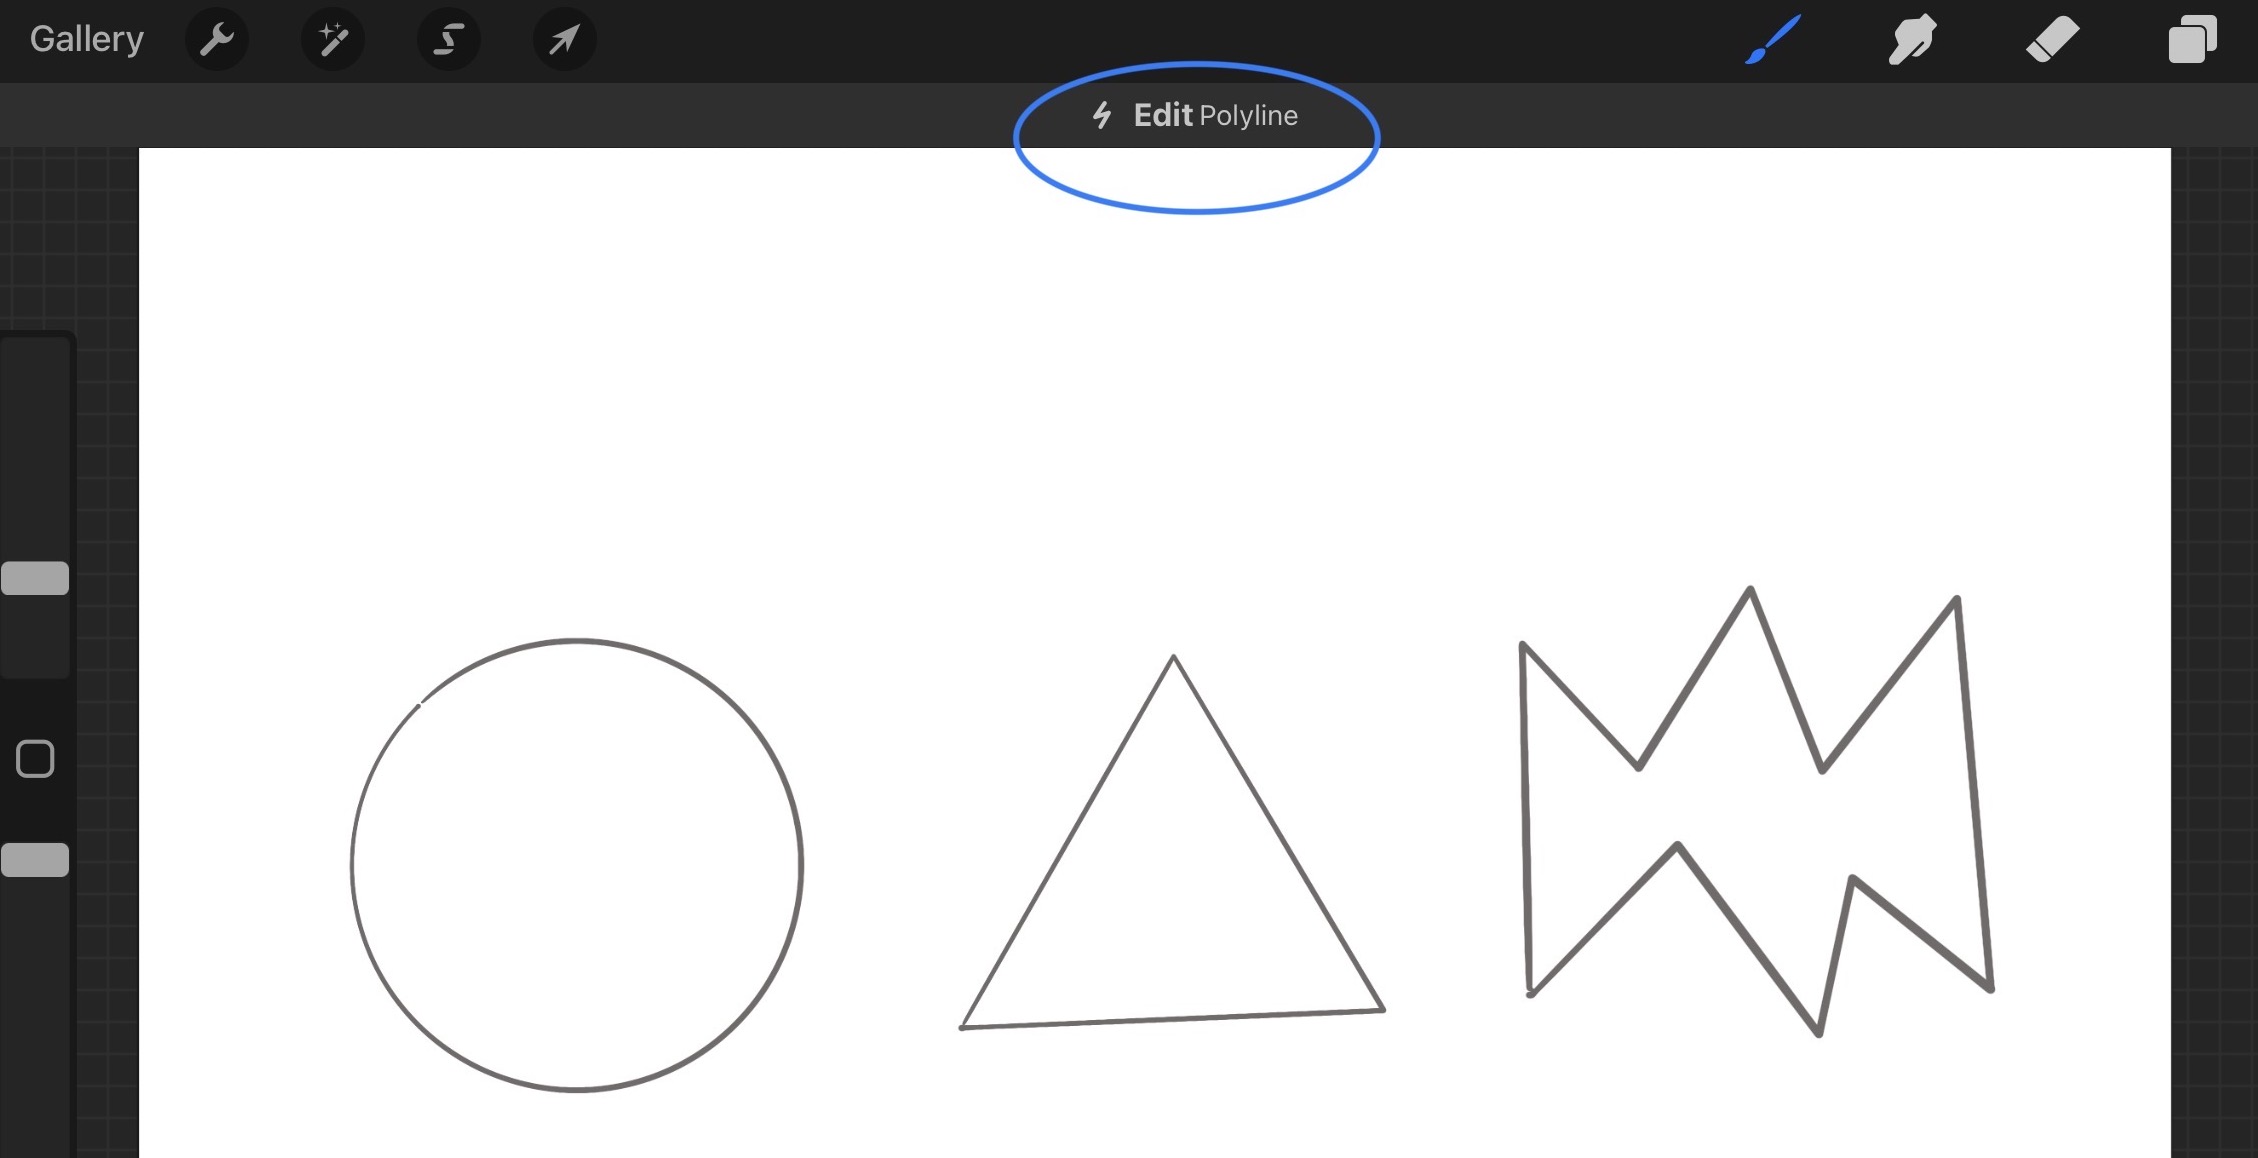
More than that, you can adjust the shape by clicking on “Edit shape” and playing with it.
9. Create your own color palettes
When I first started using Procreate, I had a really hard time picking colors. I would choose colors from the default color palettes or from the color wheel but It was very slow. Then I learned how to create color palettes and everything changed. Today I’m going to show you how to do it.
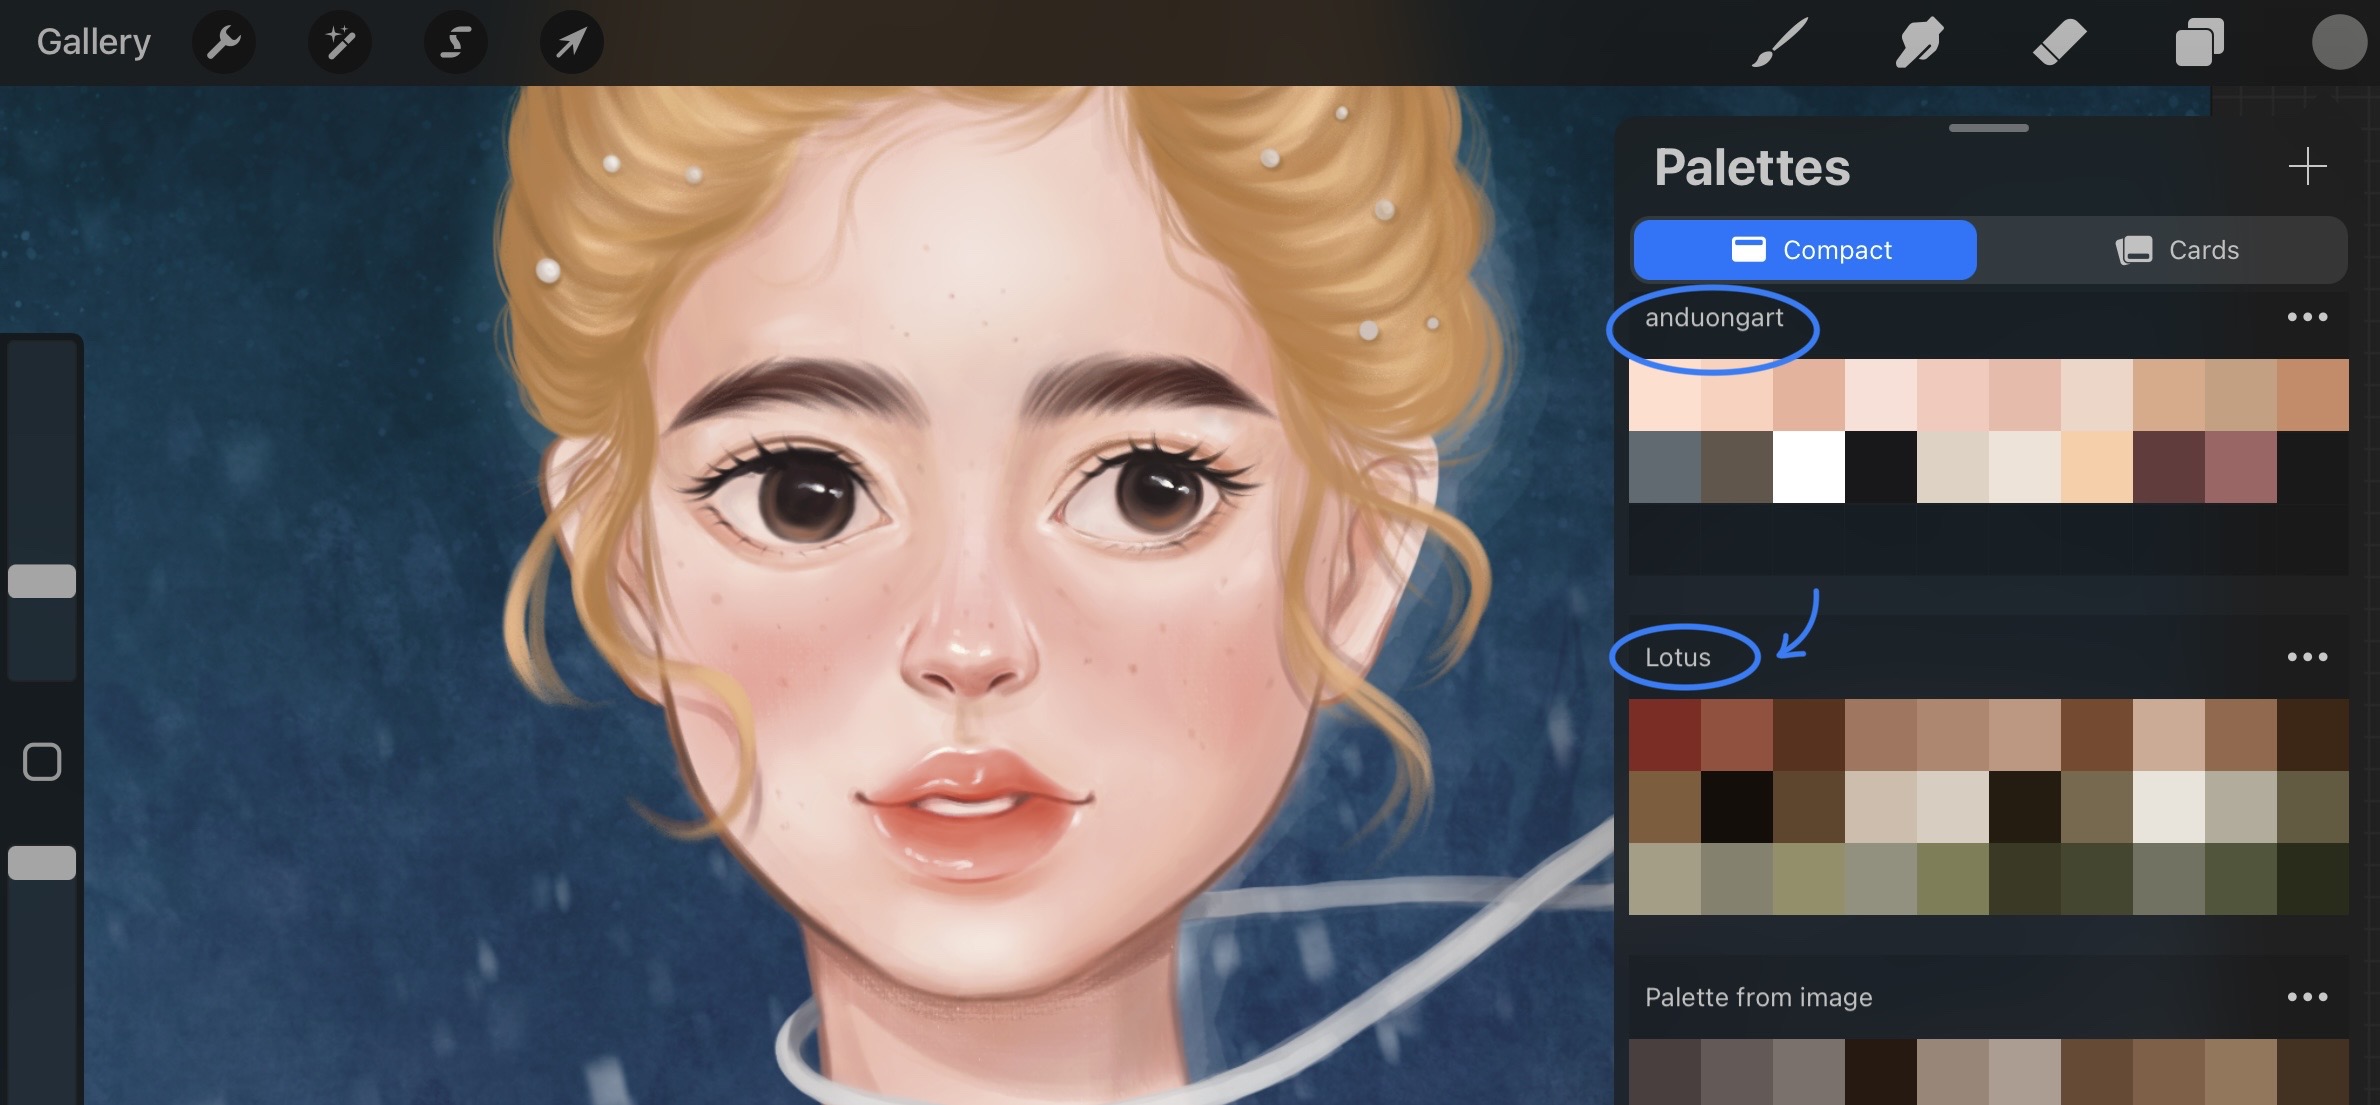
First, select the image whose colors inspire you. Once you’ve settled on an image to work from, you’ll be ready to create your personalized palette.
You’ll need to open the Color Panel. In the Color Panel submenu, you’ll find the option to show Palettes.
Press on the “+” symbol for the option to create a new color palette. Choose a name for your personalized color palette, click on the color you want to capture from the image, and place it on the palette in which you want to save it. Don’t forget that you can edit the color palettes in Procreate by adding or removing specific colors.
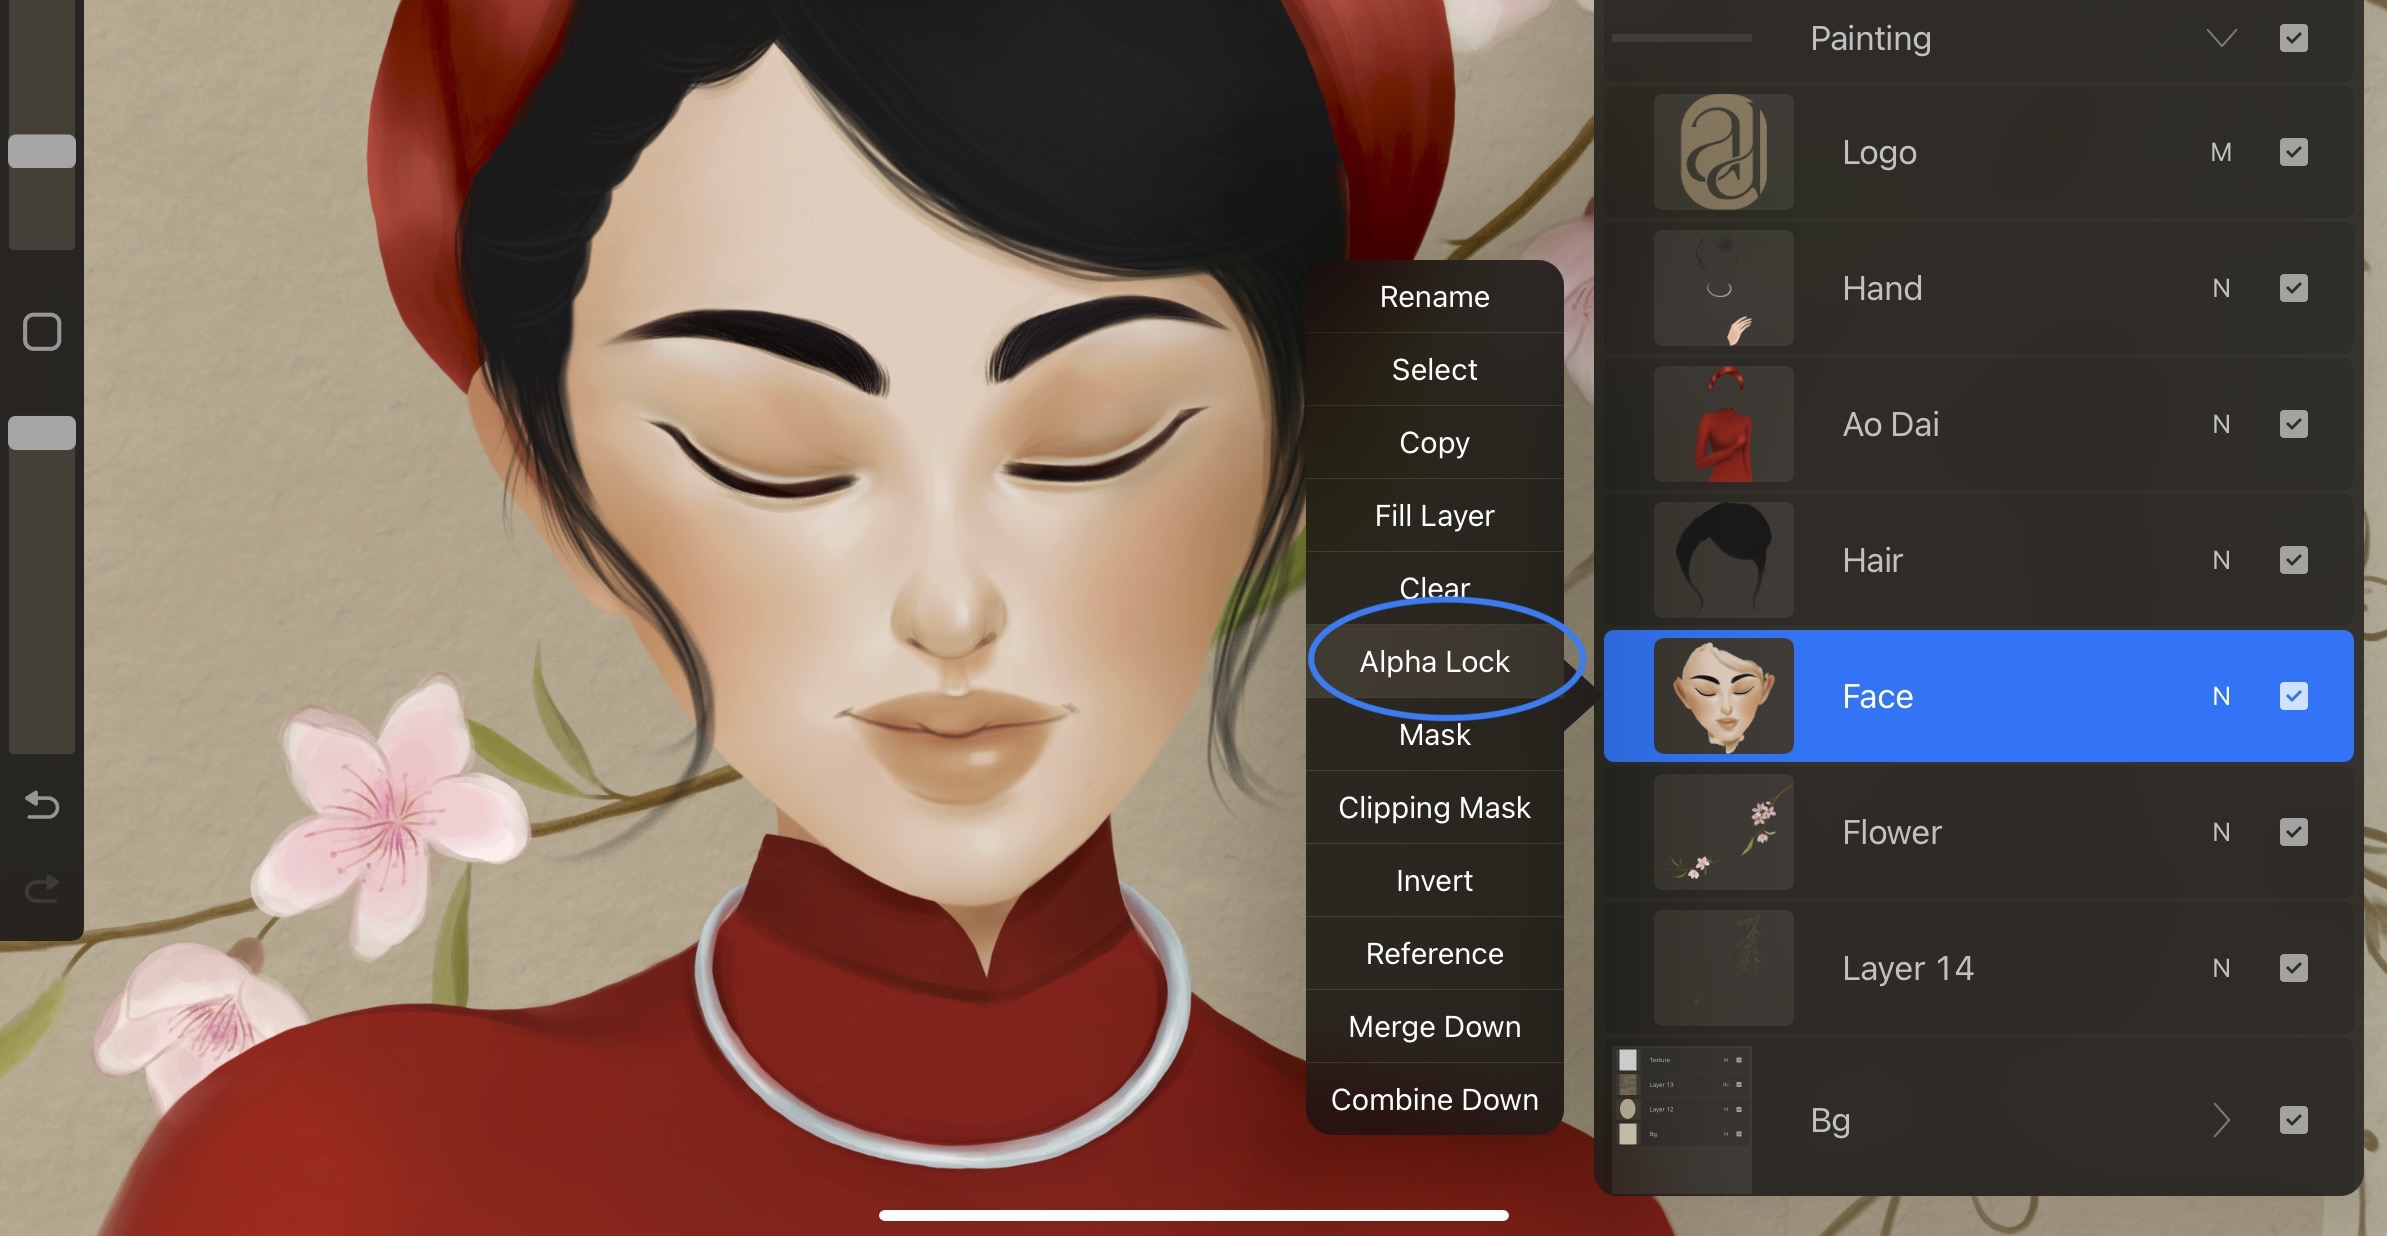
10. Use Alpha Lock
Alpha Lock is a function that allows you to paint inside of an existing shape without going outside of the lines so this allows for drawing and easy shading within the same layer. The Alpha Lock function is similar to a clipping mask, but by using Alpha Lock, you do not have to create another layer.
11. Use the Liquify Tool
There are a lot of neat features in Procreate’s Adjustments panel. I think for most portrait artists, the neatest is the liquify feature. Quickly and easily add effects to your Procreate art with just a few simple clicks.
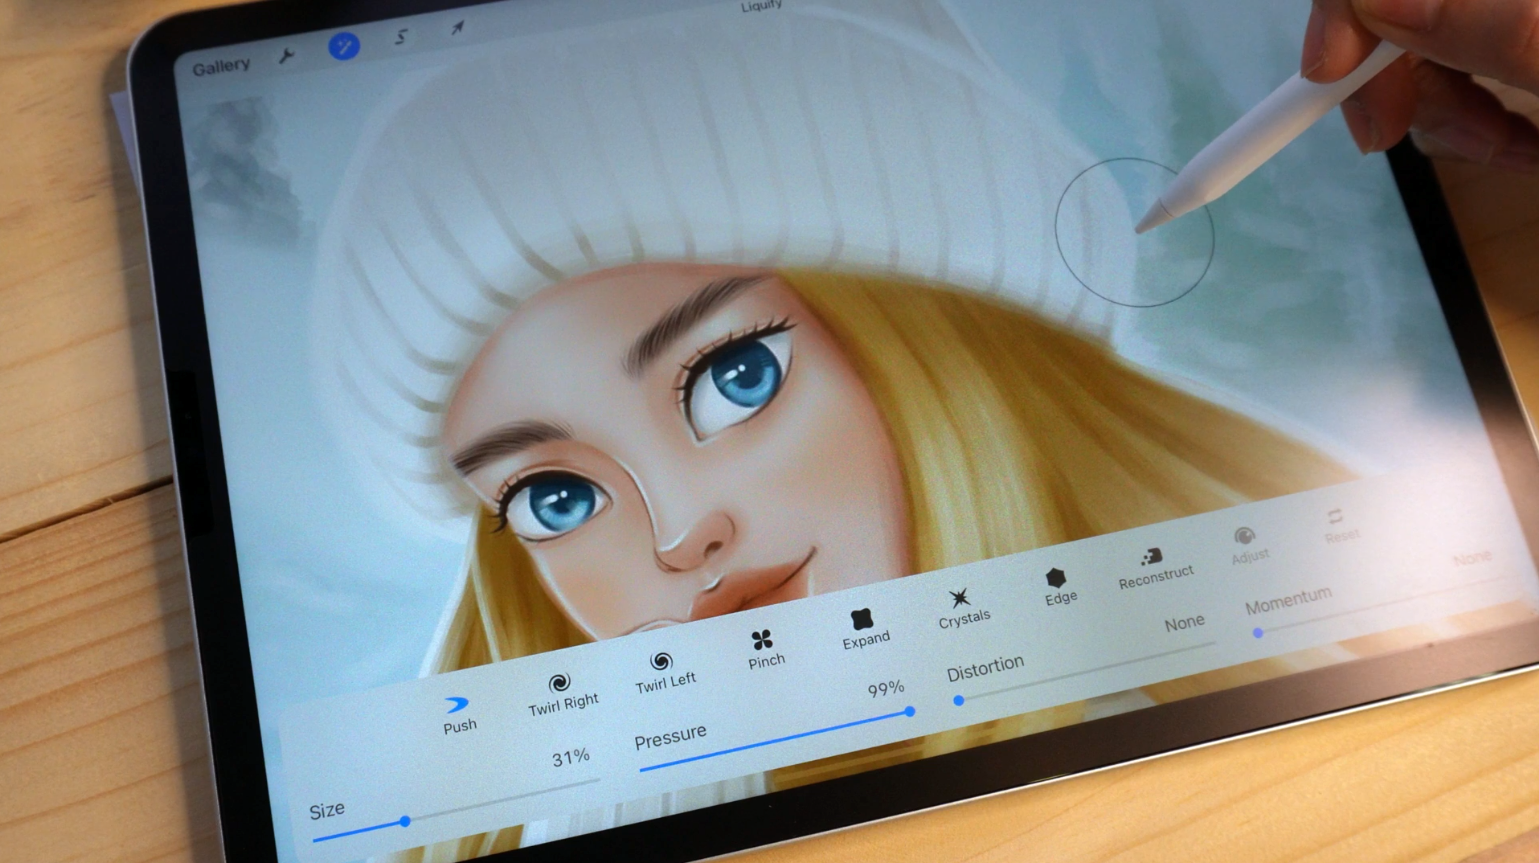
Do you know with Procreate, you can liquify multiple layers at once? It’s so useful to put all of the layers you want to liquify into a single group so that it’s easier to keep track of them.
12. Clear layer with 3 fingers
Procreate has a feature called the “3-Finger Clear” that allows you to quickly clear the contents of a layer without deleting the layer itself. This can be a useful tool when you want to remove all of the elements on a layer but keep the layer itself intact, for example, if you want to reuse the layer later.
To use the 3-Finger Clear feature in Procreate, follow these steps:
- Open the layer that you want to clear in Procreate.
- Tap and hold on to the layer with three fingers.
- Without lifting your fingers, swipe left or right across the layer.
This will clear the contents of the layer, leaving a transparent layer behind. The layer itself will remain in the Layers panel and you can continue to use it for your artwork.
Note: The 3-Finger Clear feature is only available on devices that support 3D Touch or Haptic Touch, such as the iPhone 6s or newer. If your device does not support these features, you can clear the contents of a layer by selecting the layer and then tapping the “Clear” button in the Layers panel.
13. Matching your brush with smudge & eraser
In Procreate, the smudge and eraser tools can be used to blend and remove the color from your drawings and paintings. You can customize these tools by selecting a brush tip that best matches the effect you want to achieve.
To match your brush with the smudge tool:
- Open the Procreate app and create a new canvas or open an existing document.
- Tap the brush icon in the toolbar at the bottom of the screen to open the Brushes panel.
- Tap the “Smudge” tool to select it.
- Tap the “Brush” button in the top right corner of the panel to open the Brush Settings.
- From the Brush Settings, you can choose from a variety of brush tips to use with the smudge tool. Experiment with different brush tips to find the one that creates the desired effect. You can also adjust the size, opacity, and other settings to fine-tune the tool.
To match your brush with the eraser tool:
- Open the Procreate app and create a new canvas or open an existing document.
- Tap the eraser icon in the toolbar at the bottom of the screen to open the Eraser panel.
- Tap the “Brush” button in the top right corner of the panel to open the Brush Settings.
- From the Brush Settings, you can choose from a variety of brush tips to use with the eraser tool. Experiment with different brush tips to find the one that creates the desired effect. You can also adjust the size, opacity, and other settings to fine-tune the tool.
14. Switch colors quickly
Tap and hold on the color swatch in the toolbar at the bottom of the screen to access the Color Picker. While still holding the color swatch, tap and hold on the “Previous Color” button at the bottom of the Color Picker. This will switch to the color that you were using before the current color.
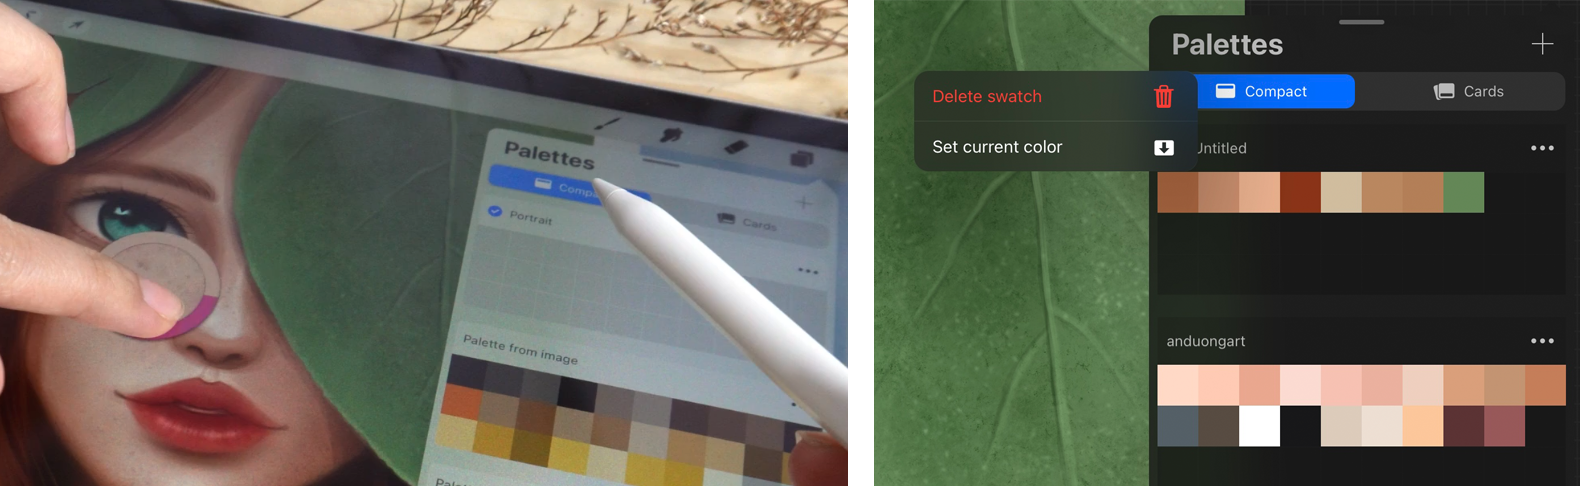
15. Import color palettes from the image
In Procreate, you can import color palettes from an image to use in your projects. Here’s how to do it:
- Open the Procreate app and create a new canvas or open an existing document.
- Tap the “Palettes” button in the top right corner of the Color Picker to access your color palettes.
- Tap the “+” icon in the top right corner of the Palettes panel to create a new palette.
- Tap the “Import” button in the top right corner of the Palette Settings.
- Select the image from which you want to import the color palette. You can choose an image from your photo library or take a new photo with your device’s camera.
- Use the Color Picker to select the colors that you want to add to your palette. You can tap and hold on the color swatch in the toolbar to access the Color Picker, and then use your finger to select colors from the image.
- Tap the “Add Color” button to add the selected color to your palette. Repeat this process until you have added all the colors that you want to include in your palette.
- Tap “Done” to save your new palette.
you can watch the full tips video on my YouTube channel or check this video:
Thank you for reading my blog post about Procreate tips that can help to organize and speed up your workflow. I hope that you found the information useful and that it will help you to work more efficiently in Procreate. If you have any additional tips or tricks that you would like to share, please leave a comment below. I would love to hear your thoughts. Thank you again for your support and for taking the time to visit my blog. I hope you have a productive and enjoyable experience using Procreate!